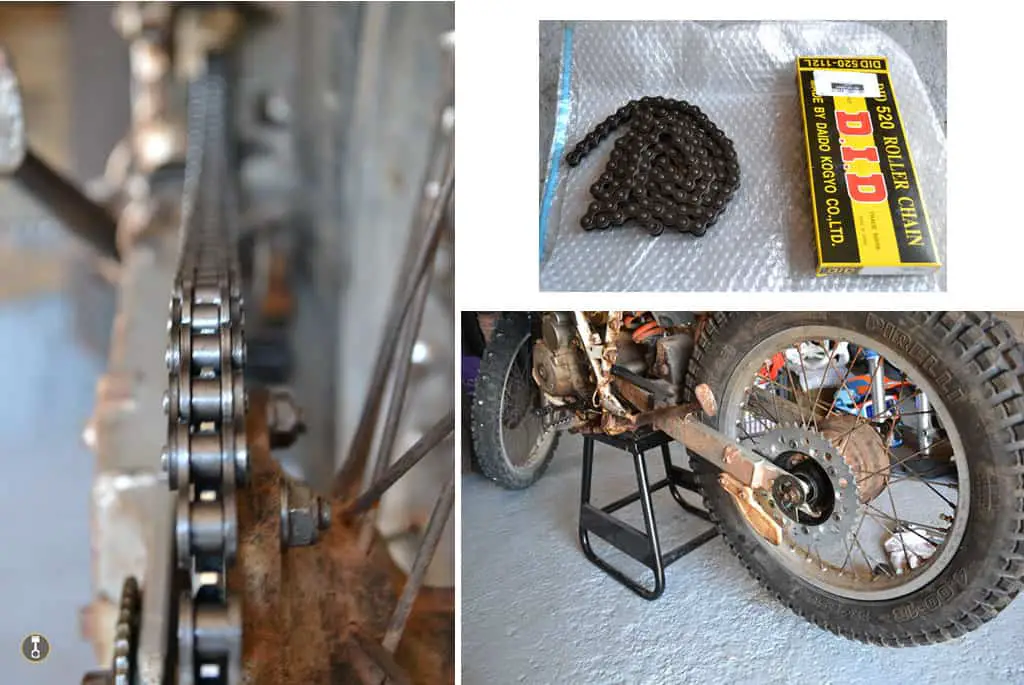
The first time I had to install a new chain was very recently when my the chain snapped on my Honda XLR200 after only having it for about a week.
At the same time of replacing the chain I decided to do the front and rear sprocket also as these were worn and probably contributed towards it.
The process of removing and installing a dirt bike chain is straight forward and wont take you to long.
If your chain hasn’t snapped but you are looking to replace it then the process goes like this. Obviously if yours has snapped then you are just going to be installing the new chain from step 5.
- Located the master chain link
- Remove the retaining clip
- Remove Chain Plate
- Pull out the master pin
- Roll on new chain
- Adjust length if required
- Install master pin
- Install chain plate
- Install retaining clip
In the rest of this post I will go over each of the steps in more detail and then also cover the following related topics. Clicking on the topic will take you straight to that part of the post.
- When to replace a the chain
- How to clean a dirt bike chain
- Can you put WD40 on a dirt bike chain
- How tight should a dirt bike chain be
- What size dirt bike chain do I need?
- How to measure dirt bike chain
- How to remove a chain link to shorten the chain
Removing The Chain
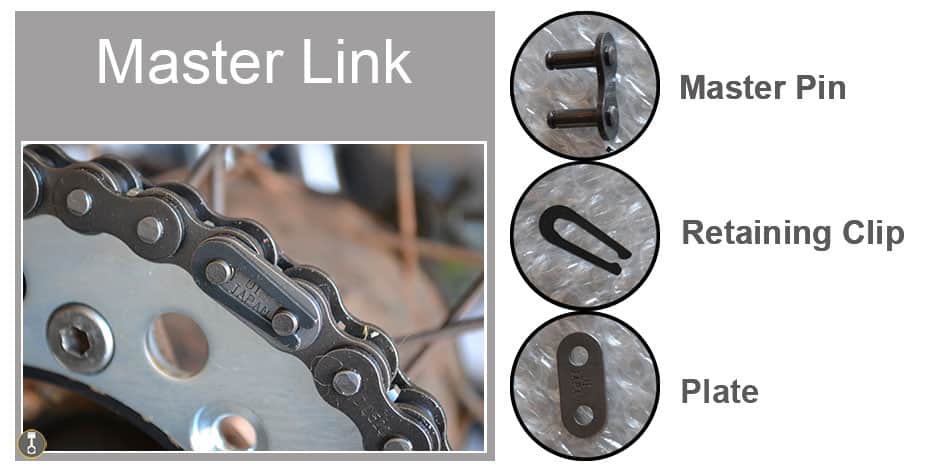
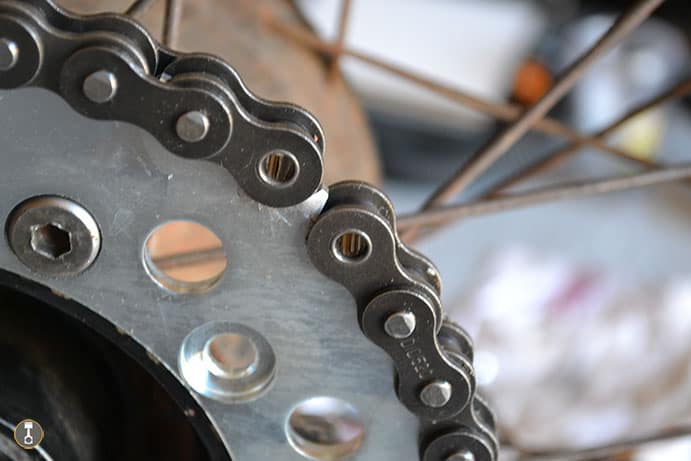
Step 1: The Master Link
Before starting you will need to get your rear bike wheel off the ground. I chuck my bike on the stand. If you haven’t got a stand then you need to improvise one.
The master link is the only place you can sepertate the chain without the need for a chain breaker tool. Unless your chain snaps!
The link consists of the master pin, master plate and a clip that holds it together.
Locate this master link to be able to take the chain off.
Step 2 : Remove The Retaining Clip
If you are installing a new chain then you will get a new clip with it. This means you can use pliers without the fear of distorting it as you will be throwing it away.
If you are re-using it then you definitley want to use the flat head screw driver approach. Sometimes this is easier than the plier anyway.
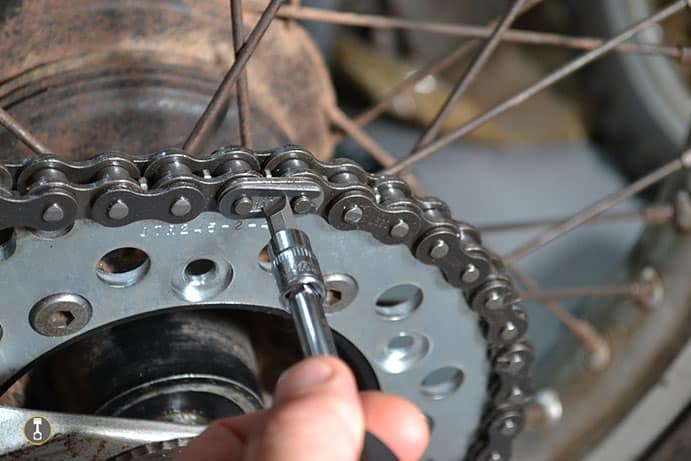
Place the drive inbetween the clip as seen in the pic and twist left or right so the clip ets forced open.
At the same time you will need to push the clip left to remove it.
Step 3: Remove The Master Link Plate
This should just pull off with your fingers. If it is stuck then use a little gentle persuasion with the flat head driver.
Step 4: Remove The Master Pin
The last thing to do here is pull out the pin from the master link. Most of the time these are easy to pull out, but every now a then you will need to encourage them.
The chain should now be seperated and if you spin the wheel lightly the chain will roll off into a heap on the floor.
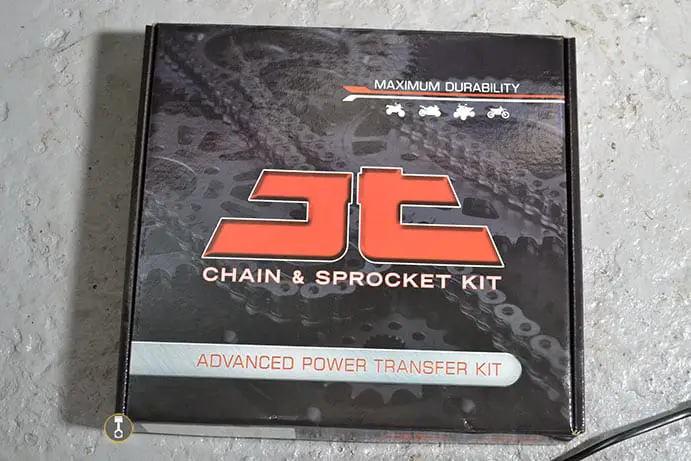
Tip: Change Your Sprockets
If you are replacing the chain, if funds allow it is a very good idea to change out the front and rear sprockets. Whats more then cost of buying it as a kit offers good value.
Another bonus about buying the chain and sprocket set is the chain should be the correct lenght so you wont have to do any additional cutting.
I bought mine from Wemoto.com for £48.56 delivered. –
Step 5: Roll On The New Chain

Just as easy as the old chain rolled off, the new one can be rolled on.
If you have a chain guard installed up the front sprocket end, which you probably will have, it can be easier to install the chain when it is off.
Start rolling the chain on the back wheel and feed it through, round the front sprocket and back down to the rear sprocket.
As I said, if you bought a kit then it will probably marry up nicely like mine pictured below.
Step 6: Adjust The Chain Length If Needed
Now would be the time to adjust the chain length by removing links to make it shorter. Below this post I talk more about how you can do this.]
Step 7: Install The Master Pin
Take your new master pin and insert it into the links so the chain become complete. Push it through from the back.
Step 8: Install The Plate
The plate goes over the pins to form the master link. You will probably need a pair of pliers here to help put enough preasure on it to push it fully on.
There is a tool you can buy for this but in my experience pliers work just fine.
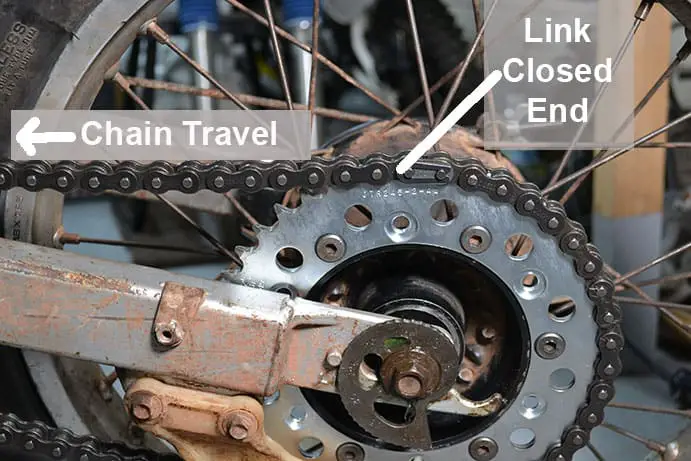
Step 9: Install The Retaining Clip
The clip can be a little fiddly so patience maybe needed.
You do need to make sure you get it on the right way. You want the closed end of the clip to be facing the same way as the chain is travelling so if it gets snagged on debris or brush it wont ping off.
You should now be good to go with your new chain installed.
When To Replace A Dirt Bike Chain
This will somewhat depend on your riding terrain and the maintenance you carry out on the bike.
If you maintain it well then you can get upto to 10 times as much use from a chain and sprocket set than if you were to do nothing.
This means cleaning the chain for every 2 tanks of fuel as a rule of thumbs.
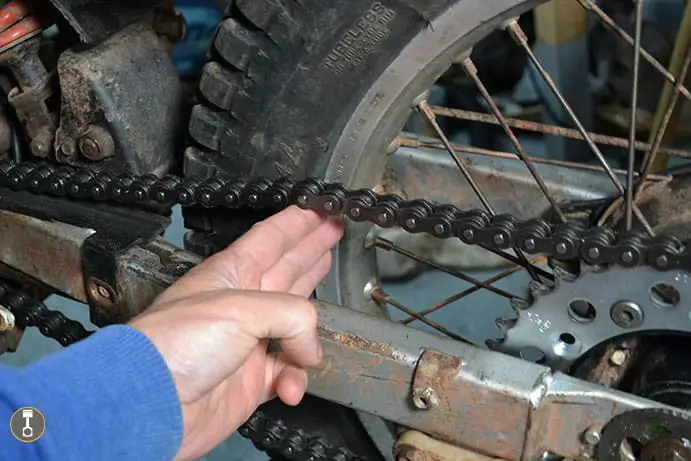
Here are 2 ways to check your chain to see if it needs replacing.
- Pull the chain from the back of the rear sprocket. If you can see daylight between the chain and sprocket then it’s time for a change.
- Try and move individual links towards and apart from each other. If you have play here then the chain is worn and needs replacing.
How To Clean A Dirt Bike Chain
If you make cleaning your chain part of your maintenance schedule then you will get alot more use out of it.
At most cleaning it every 2 tanks of fuel is a good rule of thumb, but it will depend on your riding style and terrain. I use my XLR200 as a run around on the road as well as green laning, and road use will produce less a mud and dirt then the tracks.
I’m happy with the 2 tank rule for road riding, but to be honest if I have been trail riding then the bike gets a proper clean after every use and that inludes the chain.
Some people will use WD40 to clean the chain but this is not a good idea. You can read more as to why not below.
You want to clean it with Kerosene by spraying it onto the chain and agitating it with a brush. With your bike on a stand, spin the wheel to rotate the chain.
I like to spray and rotate the chain until it is all covered, then leave for a few minutes before scrubbing.
Now rinse the chain using low pressure from a garden hose. Don’t use a pressure washer.
Using a lint free cloth dry the chain and wipe off any excess dirt and grease. Then repeat if needed.
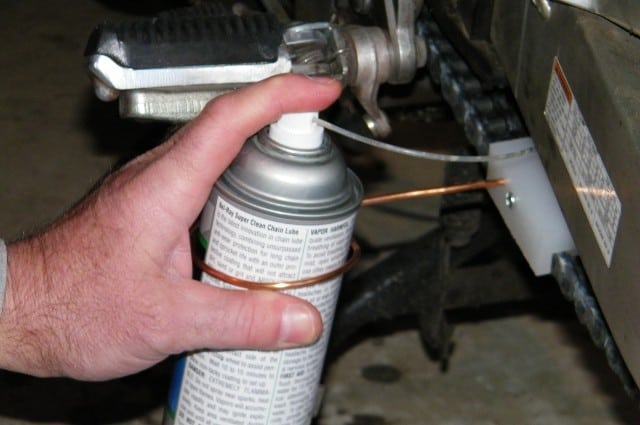
The only left to do now is regrease the chain. For this use a proper bike chain grease and it’s worth getting a greasing tool. I use this from Grease Ninja (https://www.greaseninja.com/), and they also sell some good chain brushes which I have had in the past.
How To Clean Rust Off A Dirt Bike Chain
Soak the chain in kerosene for 10 mins then agitate with a stiff bristle brush to remove the rust. Rinse the chain under water to wash off the rusty residue and repeat if required. On the final time use a lint free rag to wipe the chain clean and dry. Use compressed air to blow out any moisture from the links then reapply chain lube.
This will restore your dirt bike chain to the best possible outcome without damaging the orings. You will need to make sure the chain is completely dry before reapplying the chain lube.
Can You Put WD40 On A Dirt Bike Chain?
We all know how good WD40 is to have around. There are so many uses for it and I admit I like the smell, however…
Do not use WD40 on your dirt bike chain.
It seems like another application for good old WD40 but it is not the recommended thing to do.
WD40 is good at displacing water so ideal for spraying on items you don’t want to rust and/or force water out. But it can infact force the grease out too so it is taking the grease away from where you need it.
How tight should a dirt bike chain be?
The ultimate answer to this question is to check your service manual. This is the only true way of finding out because all dirt bikes will be different.
That said there is away many people go by that could be the next best thing.
Using one hand put your 3 middle digits together as if you about to form the scout salute sign.
Now lift the slack of the chain with the other hand in the centre of the swing arm. Insert the salute between the swing arm and the chain and this will give you an indicator of height.
With one finger sat in the swing arm, you have your fingers stacked so they are 3 fingers high with the chain resting on top.
You are looking for the chain to be tight when in this position so you can then adjust accordingly.
Here’s a pic so you can see what I mean.
What size dirt bike chain do I need?
Kids dirt bikes use a 420 chain and an adult sized dirt bike uses a 520 chain.
Understand that when talking about the size of the chain it is different to the length. The size refers to the spec of the rollers. This is made up of the pitch (distance between rollers) and width (one side of the chain plate to the other)
For a more detailed explanation see this article on Wikipedia
Chain size can vary depending on your sprocket sizes both in thickness and width. The larger sprockets will increase the chain length and if you are not following the service manual chain and sprocket setup then you will likely be adjusting the chain length yourself to get the correct fit.
How To Measure A Dirt Bike Chain
If you are trying to establish the chain length of an exisiting chain then you don’t simply measure the chain to get a unit measurement. Doing this on a used chain will not be accurate because of chain stretch.
Measure a chain by counting the number of links. This way you can get a new chain with the same amount of links knowing it is the correct size and the same as the used one.
How to remove a chain link to shorten the chain
If you need to cut your chain then you will need to invest in a chain cutting tool. These are not expensive, like $15 and are easy to use.
The process of cutting a chain is basically pushing the pins out that hold the plates together. This video shows what to do.
Head over to my dirt bike maintanence hub for more info.
Go to my dirt bike project page to see what bike I am currently rebuilding.