We this is my first project… like ever. I have never done a bike rebuild before and have no experience in anything like this so it will be interesting to say the least.
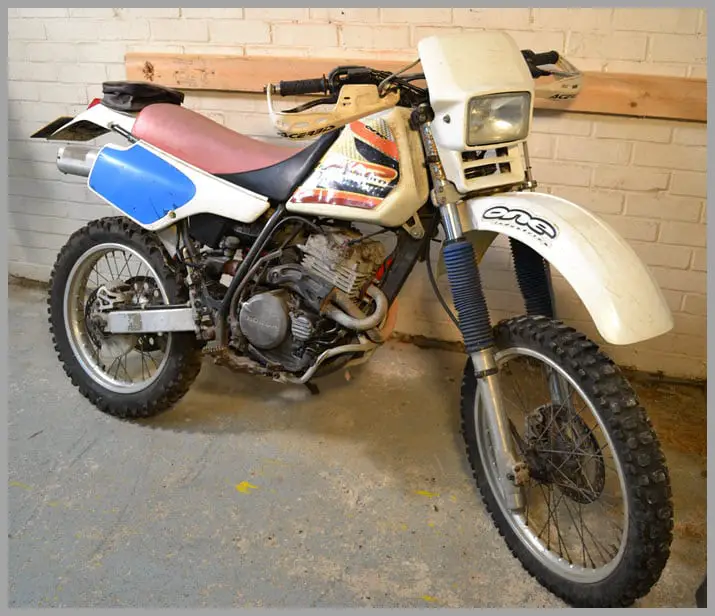
The XR which i’ll be stripping down in a bike I have owned for 7 years and has given me many hours of hppy riding.
Stripping down the bike as a project and restoring her back to full glory is something that I have always wanted to do ever since buying her.
To be honest she has needed it from the start and I have always delayed it because the thought has been quite daunting. Then wind foward to winter 2019 and I decided I would either sell the bike or restore it and it was a close call.
I did in fact attempt to off load her to my neighbour who expressed an interest in her but he later declined after telling me have a go, it’s not that hard.
So here I am, next thing you know i’m documenting it on my blog, creating Youtube videos (still to publish) and sharing my experience with you guys.
This page will be the hub, kinda like a contents page of information. I’ll try splitting the build down into sections then linking out to the various articles and videos on each part which should keep everything nice and neat. It would be great for other to be able to use this a resource if they are in the same boat.
I’m would love to hear any questions or even advice you want to share at any time so just drop a comment at the end of this page. Thanks for stopping by and I hope you enjoy the journey with me.
Neal.
Short History Of My XR250R
As I mentioned above as of March 2020 I have owned the bike for 7 years. If I remember rightly I purchased the bike for £700 and picked it up locally to where I live, which is in the south of the UK.
The bike was registered in 1991 which makes it 29 years old. That means in another 10 years she will be tax exempt…if the rules stay the same 🙂
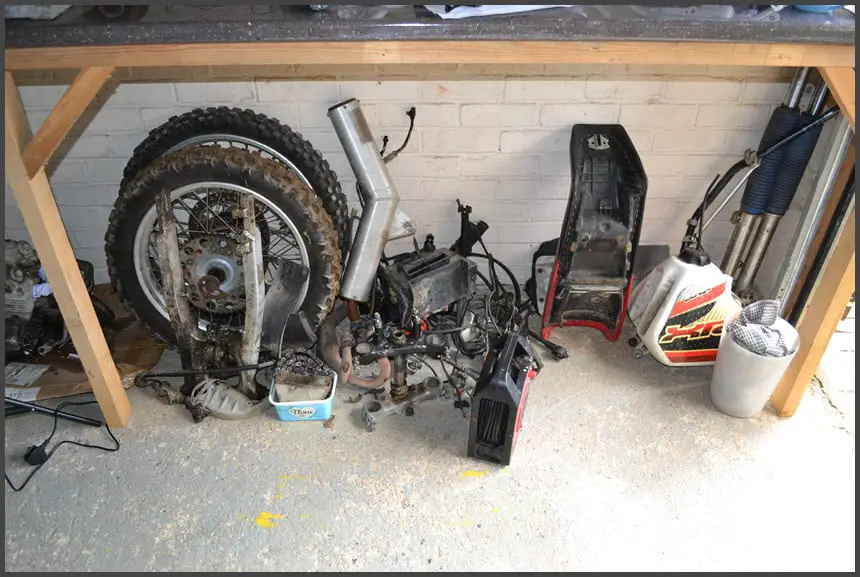
The general condition of the XR when I picked it up is probably best described as tired. There were quite a few little fixes here and there, like with cable ties and stuff like that.
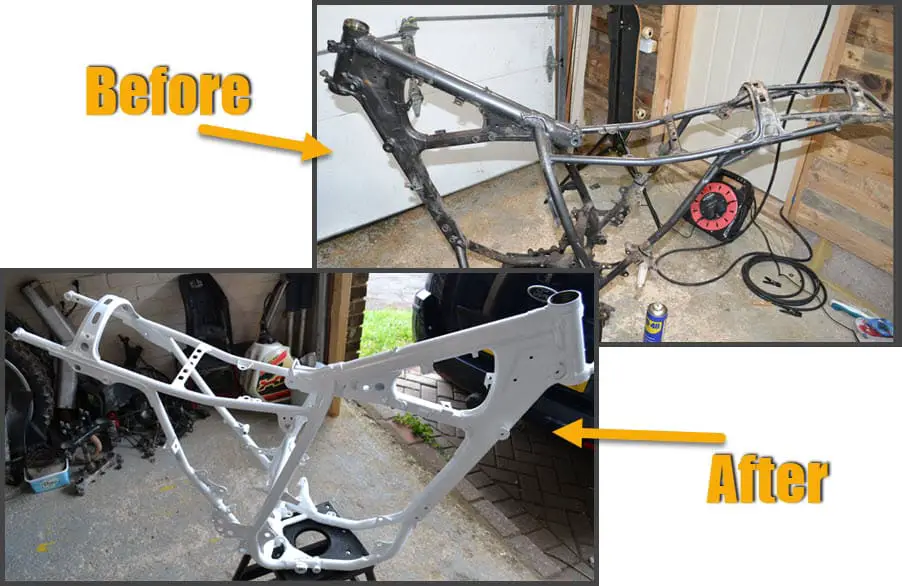
It wasn’t until getting the frame blasted that I thought the greyish/black colour was orginal but it turns out it was white. That lead me to doing more research to find out exactly what it would of looked like which was interesting.
Thats pretty much it in terms of what I know about it… you can catch up of the progress below.
Project Dirt Bike YouTube Channel
IT’S FINALLY HERE…..
It’s gone live with videos scheduled on a regular basis so get on over there and hit subscribe to help support me and grow the channel.
https://www.youtube.com/channel/UCZ06vn59eCBZliXKQNEtmpQ
Ongoing Tools and Expenses List
As part of rebuilding the XR there will be associated costs and tools required so I thought it would be a good idea to list all of these so people can get a clear picture of the overall expense of the project and the tools used.
Click here for the Tools & Expenses page