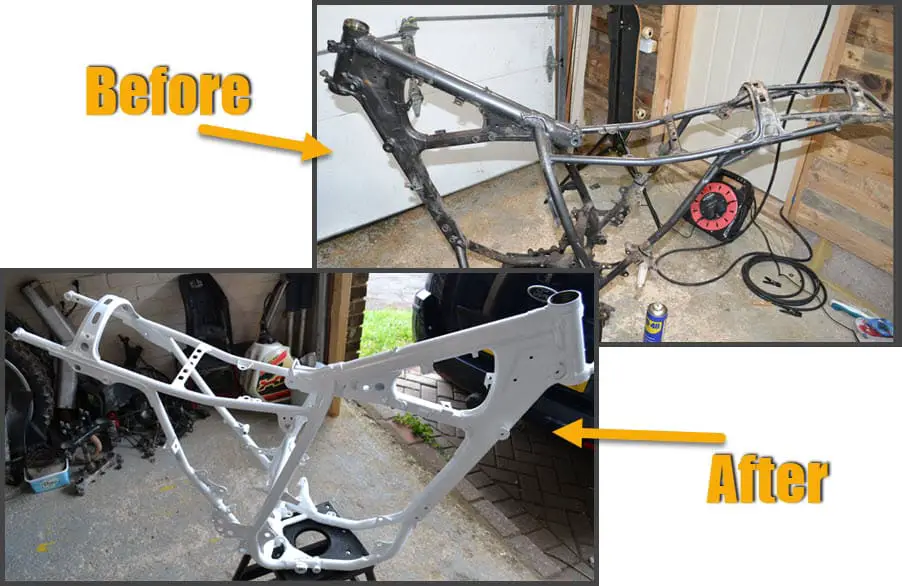
So the build is now underway and this is perhaps the first really exciting part of the project, getting the frame powder coated after stripping it down and sand blasting it.
As an absolute novice in the dirt bike build arena stripping the bike down is surprisingly easy, so dont be scared if you are looking to get your hands dirty. The key to this is go slowly and stay organised.
I photographed the bike alot from different angles before taking anything off, then when I started removing parts I placed them into pots, sealable bags and tubs then labelled them as best I could so I know exactly where the part has come from.
Sometimes I didnt know what a part was called, which is what happens when your in the early stages of a dirtbike project and your a beginner I guess, so I just best described what the part looked like and where abouts on the bike it came from.
I also took plenty of pictures of individual elements in detail, for example the forks before and after I took them off, if things where attached then close up shots of details so I have plenty to reference against when I put things back together.
As someone who hasn’t done this before I think this will invaluable.
It wasn’t long before I had the dike down to the frame and now it was time to think about getting it powder coated and there was a couple of things consider.
Firstly was I going to keep the frame it’s original colour? to which I decided I would, and secondly I had to find out what colour the frame was when it left the factory.
Here is the frame after stripping it down before sand blasting.
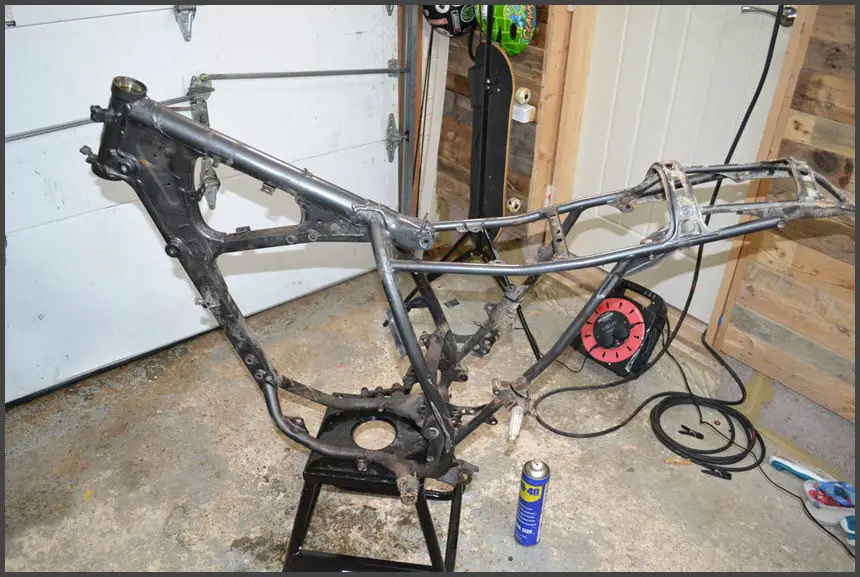
This grey colour of the frame could of been original at this stage. I didnt know. The quality of the paint on it is very good which also gave me no clue as to wether this had changed colour during in it’s life up until now.
My approach was to send the frame for sand blasting whilst I researched the original colour of the frame and hoping that by the time the blasting was complete I would have a decision and the colour ready to go.
Preparing The Frame
I have never sent anything to get blasted before but luckily I have a friend (Richie) who has a mobile blasting business so I gave him a call. Richie advised me that I should prep the frame by making sure anything I didn’t want blasting to be removed. This included all rubber bungs and anything else I could find.
OK…
So I thought I had that covered but I was surprised to find 3 rubber gromets I had missed on the intial strip down that were still on the frame. When I got the frame back I realsied I had missed one entirley so that got blasted.
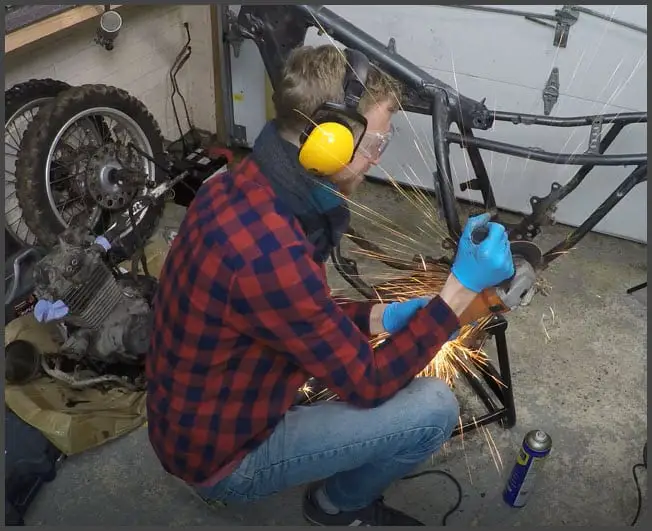
The bearing in the head had to come out and I wanted to get rid of the foot pegs that one of the previous owners had welded on to the frame.

Grinding the pegs off wasnt hard, I used a 4.5 inch grinder, made sure I had safety goggles and ear defenders on and got grinding. Took about 3 mins to get the peg off then I just went over the cut with the side of the disc to get rid of sharp pieces of metal, then used some sand paper to sand by hand until it was back flush to the frame.
A Sand Blasting Mistake
Time to get this frame to Richie for sand blasting. I loaded her up into the back of the car and drove the short journey to his house. After dropping the frame off I waited for a day or two and he texted me to say she was ready for collection. Excitment all round!!!
I couldn’t wait to see the result so I jumped in the car straight away. For your info the frame cost me £40 to get blasted and I didn’t know if this was the going price or not, but it seemed reasonable and it being done by someone I know and trusted meant I wasnt to concerned about shopping around.
Inspecting the frame when collecting I could see that there was some oxidisation happening on the very bottom where the frame sits on the ground. I asked Richie about this and he said it was impossible to prevent beause the sand he blasts with comes out wet and obviously when the bike is stood any moisture is going to run down and collect at the base and encourage the rust process to begin.
He did say it’s normal and the paint shop would be used to this and they would simply go over that area by hand before painting. No problem I thought! Lets get this beast painted.
Now The paint shop I found was a local company and they were recommended by Richie and someone else I know. This company have a shot blasting division and a powder coating division. When I turned up to the powder coating division his words were ..’what a shit job, that will all need re-doing’. I was abit surprised by his tone and although I imagined something would need to be done with the oxidisation I thought the rest looked spot on.
Anyway he insisted he wouldn’t touch it until their shot blasting department had redone it. So I went over to see them, which is in another building, explained what had been done and that their guys thought it was aweful and that I would appreciate their opinion.
These guys were really nice and turns out they actually know Richie. They informed me that the entire job was not bad at all and they get Richies clients often but the base would need redoing.
This is what I expected and they even went as far as to say dont use their own paint shop as the bloke was an idiot and didn’t care to much for smaller projects. That explains his attitude problem. and you didn’t have to tell me twice when the bloke had spoken to me the way he had done. I wont be recommending them.
To redo the work it was going to be another £30 which is the same price they charge for the whole frame as it was their cheapest rate. So I should of perhaps gone to them in the first place.
A day later I am back to pick up the frame and run it over to the local powder coating place they had recommended.
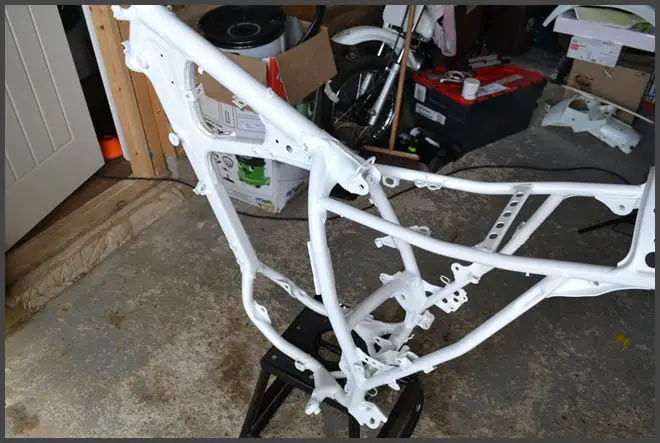
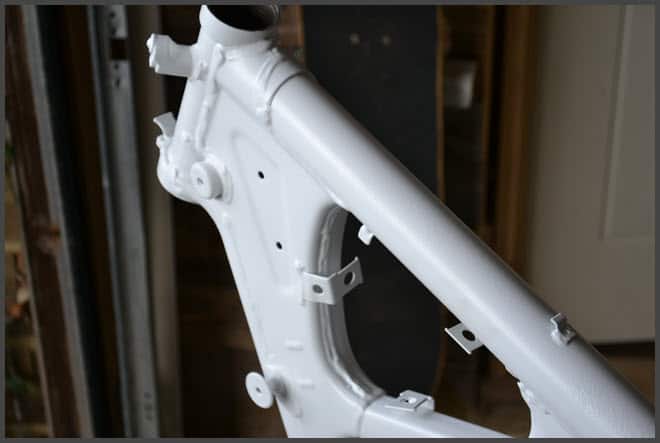
Powder Coating Colour: White, White or White
A great company this one, I felt instantly happy with the way they operated and knew I wasn’t going to have any problems here.
Steve was the chaps name and the next question was What colour do you want? My reply was white. I think at this point he knew he was dealing with a novice.
Turns out there are 10’s maybe even over a hundred different whites. The honda white I was after was called Shasta White NH138. This is not available in a powder which means they can’t produce this unless you have a mix receipe. I didn’t and doesn’t look like the internet does either.
This left me to decide on what white I wanted and incase you are wanting to know the code is 9016 in Satin. If you reference that code with a powder coating firm they should be able to replicate the white I used.
As part of the frame i also had some foot pegs and foot brake lever which I decided to get done in black. Again the code is 9005 which is a standard matte black. The idea is to have a constrast between these and the white frame then I will possibly powder coat the wheel in the same black. Although this is not yet set in stone.
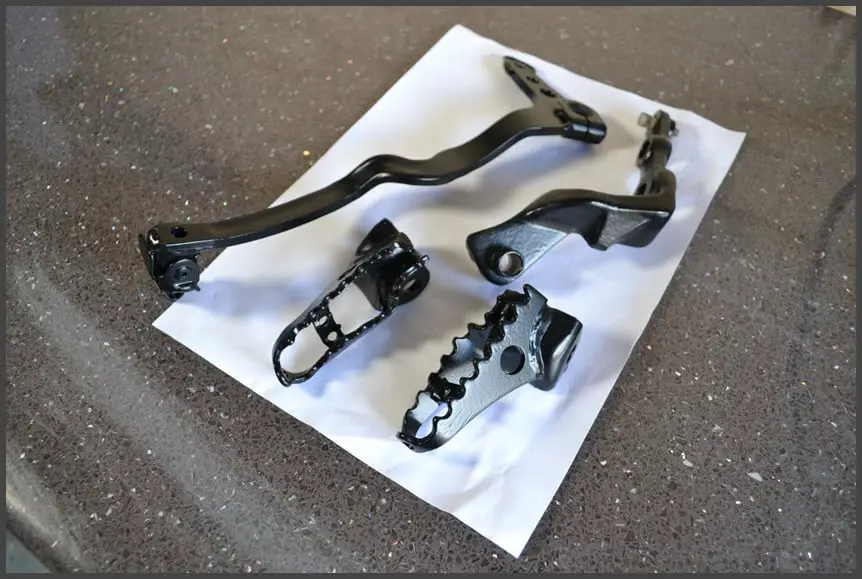
There’s a pic of the powder coated pegs and lever. These aren’t honda colours although i’m sure they will have a black referenced somewhere. As the white is Honda white then I wasn’t concerned with the black being Honda black. To be honest I very much doubt anyone is going to call me out on either colour not being original.
More Pics


That pretty much concludes this post, just a short one on powder coating the frame and I shall document the other powder coating parts as and when.
Dont forget that you can check the progess of the build either by following me on youtube or by checking back to the Honda XR 250 Project hub where I listed the related blog posts I have written for the various stages of the project.
