This is the first stage of the Honda XR 250 Project and for those of you wanting to follow along then I have created a hub page (here) that I am using to collect together the related posts in one place so you can either cherry pick out ones that might be of interest and/or easily follow the progress as I aim to post about each part of the dismantle and rebuild process.
Rebuilding this Honda XR250 has been on my list of ‘must do that someday’ jobs, ever since I have had it which is about 8 years or so. Now it is finally starting.
I have tidied the garage, built a work bench and got some basic tools like spanners, sockets, and drivers together to start taking this dirt bike apart. From the garage I shall take the bike section by section and document it here on the blog and also on my YouTube channel.
Let’s Do It!
Getting The Dirt Bike On The Bike Stand
First job was to get the bike up on this stand I bought and it is harder than it looks. I’m either crap at it or I am doing something wrong…anyway I managed to get it up.
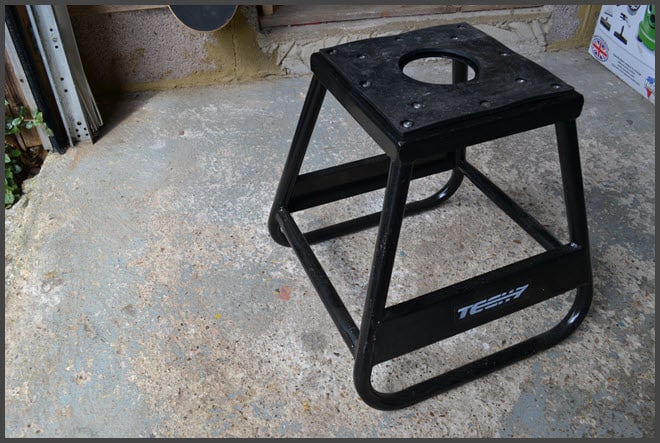
The stand is made by a company called Tech7 and is relativley cheap compared to other brands on the market. I got this brand new from eBay and it cost £32.95 with free postage.
The quality of the stand is great, it’s solid and has that rubber mat on the top, which you can see in the pic and is there to protect the bike. There is nothing to go wrong with it so I would expect it to last a years. By the way the hole in the middle is spot on for draining the oil, the sump bolt is bang in the middle which was handy.
I did like the look of the stands that pump up to give you a better working height but they were big bucks in comparison and I didnt want to commit to one of those just yet.
By the way I have also set up a page dedicated to costs and I break the build down into sections like tools, parts and services ( like getting the frame powder coated). So go and check that out if you want to know more details about pricing and anything I have used etc. Project Tools & Expenses Page
TOP TIP 1: Get Your Camera Out
So once the bike was on the stand my first idea was to take a camera and go round the whole bike taking loads of photos from different angles. I am hoping that these pics will give me a good source of reference for when I am peicing the bike back together.
I also photo’d parts of the bike as I took of components that revealed other components. This did interupt work flow and sometimes was a pain because I had dirty hands and then had to clean them before using my camera but like I say, I think it will pay off later.
Now the bike was photo’d the fun could begin. I simply started working from one end of the bike to the other beginning at the rear first, for no particular reason.
More often than not you start taking one part of the bike off only to find it is being blocked by another which needs to come off first. Sometimes you ended up with a chain of say 6 parts before being able to take off the part you originally started on. This perhaps wouldn’t happen for people with more experience , which is anyone who has ever done this before. Nether the less it didn’t mean I coudn’t get the job done.
TOP TIP 2: Organising Parts
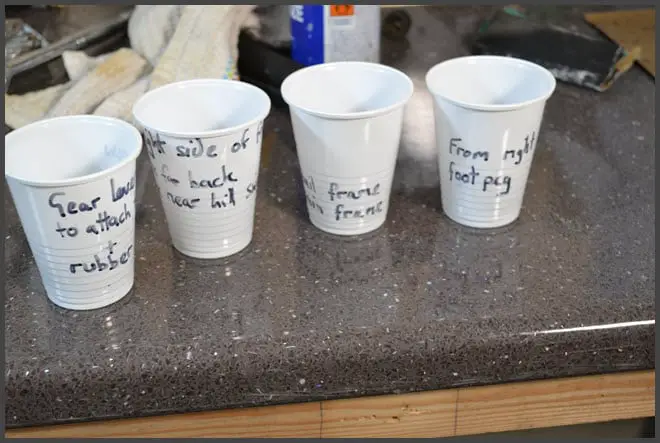
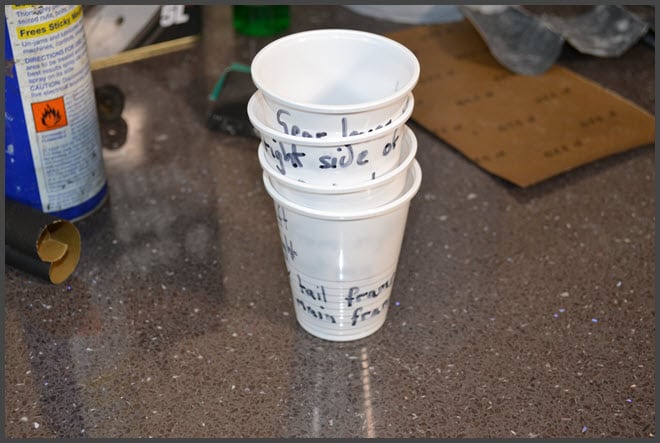
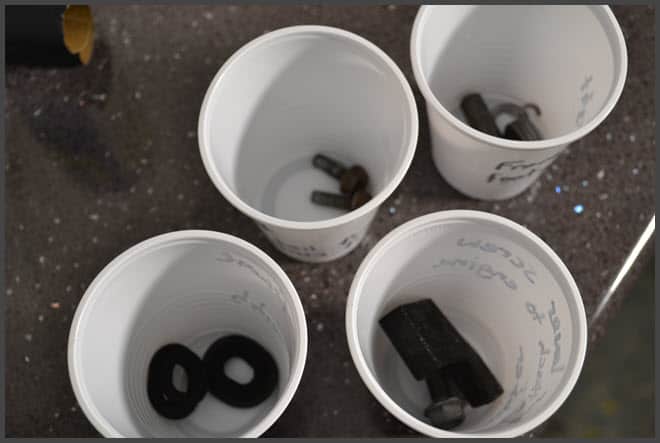
This is some advice I picked up from a family member who worked for sometime as a scooter mechanic. He told me that bagging and labelling items that come of the bike save you alot of time and hassle later one.
That makes sense to me so that sis what I have done. I started off by placing smaller items into small clear plastic sealable bags and using a marker to write a short description. This is great way of doing but you can also diversify. I had to pop round the local shop to get some more bags when I found they had run out and the only thing I could find were white plastic disposable cups. The kind you use for kids parties. They do the job, you can write on the outside of the cup and you get the added bonus of being able to stack them.
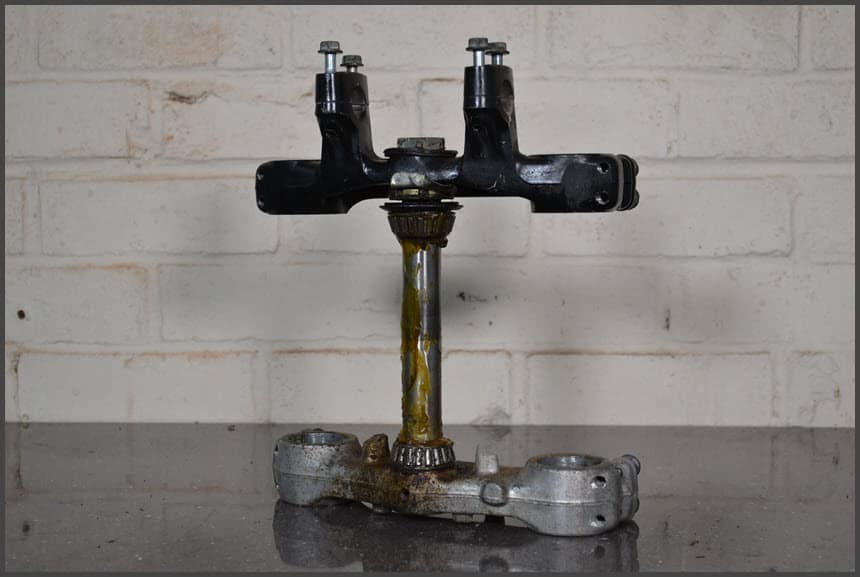
For larger parts that came off of the bike I either tried to keep them as large as possible or but bits back together after taking them off. For example the steering stem has the top and bottom fork clamps and the top gets taken off to be able to take the stem out of the frame. I then reassembled it so I know how it was then when I come to refurb this part I will do it as it’s own mini project so it’s easier to manage and remember what goes where.
Dismantling the bike is not a hard process as it turns out. The best advice I could probably give is to take your time and be organised. Also have a can of WD40 handy as if you bike has spent years practically untouched then i’m sure you will have your fair share of stuck bolts like I did.
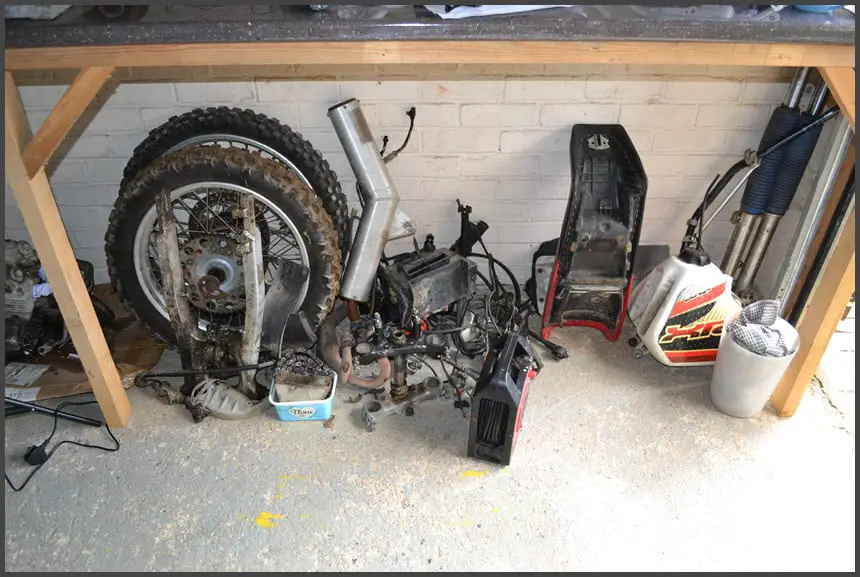
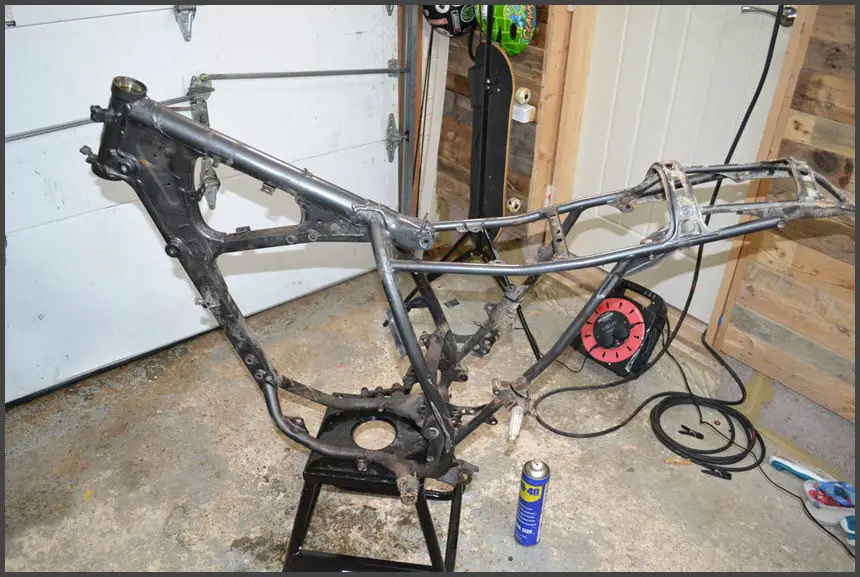
Here is a couple shots of the XR fully stripped down and the frame which is ready to go off for shot blasting and powder coating which will be the next stage on this journey.
Until next time….