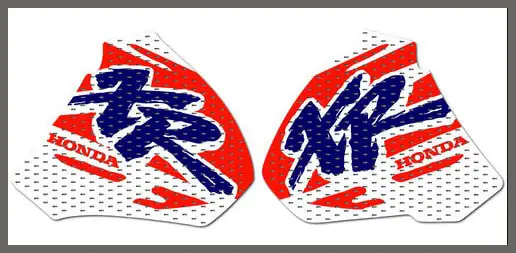
At some point the graphics on any dirt bike will need replacing and it isn’t hard to do so why not give it a go? There is a saying that is used by many people in many different walks of life, and that is “preperation is key”. If you get the prep right, then the end will result will follow, and this is also true when installing dirt bike graphics.
To prep dirt bike plastics for graphics, first remove any old glue and residue left over from old graphics. Next you need to eliminate any scratches by using the wet and dry sandpaper method. Finally giving the plastic a deep clean and degrease to ensure your preperation is complete and ready for your new shiney graphics kit.
In this short post we shall take a look at the different steps and find out how to do them along with any tools and materials we may need. We can also have a quick look at tips fr installing your new graphics.
Removing Glue From Old Graphics
Unless your graphics have come away from the plastics on their own, which isn’t very common then you can get the majority of the glue of if you take the graphics off carefully.
Do this by first applying heat to the graphic, either with a heat gun on a low setting or like me, a hair dryer. If you choose the heat gun apraoch then be double careful not to have it to hot, or if you have no heat control dont leave it focused in one spot for any period of time so the plastic itslef doesn’t start to melt and distort. Thats why I like the hair dryer because they dont get hot enough for that.
Once you have heated the graphic the glue underneath will be more likely to come away with the graphic when you peel it off. So starting in one corner, very gently peel it of in an even, sow, stroke. You can keep heat applied to the back of the graphic as you go.
If you have glue left to get off then you have a few options. Firstly I would see if anything can be taken off by placing some of the old graphic back on and pulling it back off, trying to encourage it to stick to the old decal.
My next move would be to use a credit card and slowly scrape any excess off that I can. Applying heat can be used at this stage to help soften the adhesive
Following this I would try a degreaser, white spirit, fuel, off the shelf degreasers can all be tried. You dont want to scrub it with anything abrasive. If you do you will end scratching the plastic and pushing adhesive into the scratch marks making them harder get out.
Normally at this stage the glue would of been removed but if you not in luck I would keeping repeating the credit card step followed by the degreaser step until you achieve the required result.
How To Take Out Scratches
To do an absolute proper job then you would take out any scratches you can find but it wil depend on what finish you are trying to achieve.
Light scratches and maybe some medium scratches can be hidden with the graphics but certain sized scratches that are medium to heavy will effect the finish of the installed graphic. I’ll leave it up to you to decide but we will look at the best way to get them out.
I’ll give you a brief overview and if you want a full guide then check out my post titled how to restore dirt bike plastics for a near perfect finish.
- Wash the plastic to get rid of dirt and grim
- start with a 120 grit, evenly sand the plastic, rinse well
- move through the following grits repeating step 2, 240grit, 400 grit, 600 grit, 1000grit and 1200 grit.
- polish with a buffing wheel on a drill
This process is not a quick one but the results can be very rewarding and will help give your graphics the best look possible.
Clean And Degrease
Depending on weather you decided to sand your plastics will have a knock on effect as to how clean they are because you would of washed them during the sanding process if you did it.
Regardless of that you will need to wipe the plastics over with degreaser to ensure a clean surface that the plastics will stick to as best as possible.
If you need to wash the plastic then do this prior to degreasing and use hot soapy water and a sponge.
After degreasing allow the plastics to dry thoroughly before venturing onto installing your new set.
There are many degreasers on the market and plenty of opinions on what works best. For me personally I would just use white spirit on this. It cheap and easy to get from any hardware store and works well on plastics without any after effects. Just but some on a lint free rag and wipe over.
Applying The New Graphics
Time for the fun part…get that new graphics kit on.
The key to this is patience. Taking your time and checking things twice before taking the plunge.
Before anything else I like to offer the graphic up to the plastic in question to get my head around the best position I think it’s likely to go.
Next…A great tip is to spray the plastic with Windex, this is a glass cleaner made by SC Johnson. When you stick a graphic on top of the Windex it wont stick to the plastic until you squeeze the glass cleaner out from underneath. This gives you time to position and check how it looks before commiting.
Next up, just like you heated the graphics that were coming off of the bike, you want to heat the new graphic using a hair dryer. A nice warm graphic will be more pliable and easier to manipluate.
Go ahead and lay the decal on to the srayed plastic. Make any positioning adjustments and when you are ready start in the center and smooth the graphic onto the plastic, at the same time you are pushing out the excess Windex from underneath. It will then start sticking.
You can use a graphics squeegee which is a small tool used for smoothing, most people would settle for a credit card if you dont have one. You will run the squeegee over the graphic to ensure there are no bubbles creases which should leave a nice clean, smooth finish graphic.
