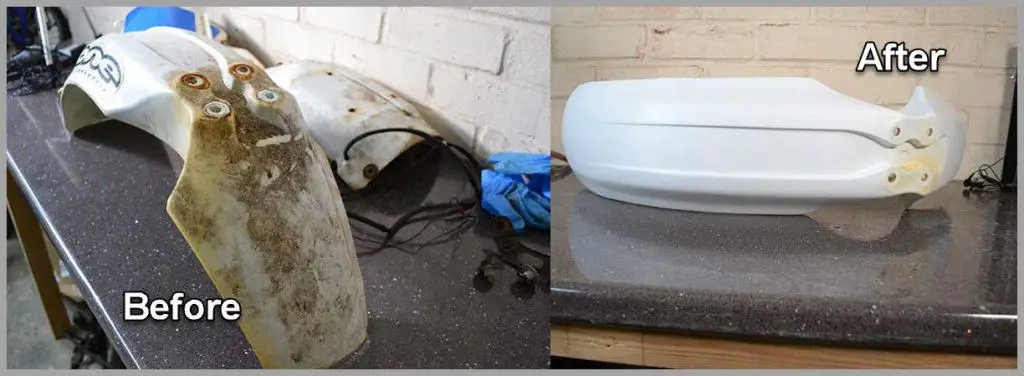
So as part of my XR250 project I had the make the decision as to whether or not I was going to replace the plastics or restore the them.
Bringing them back to life, in my opinion, would be the best option and as a worse case scenario I can always buy new so there was nothing to loose.
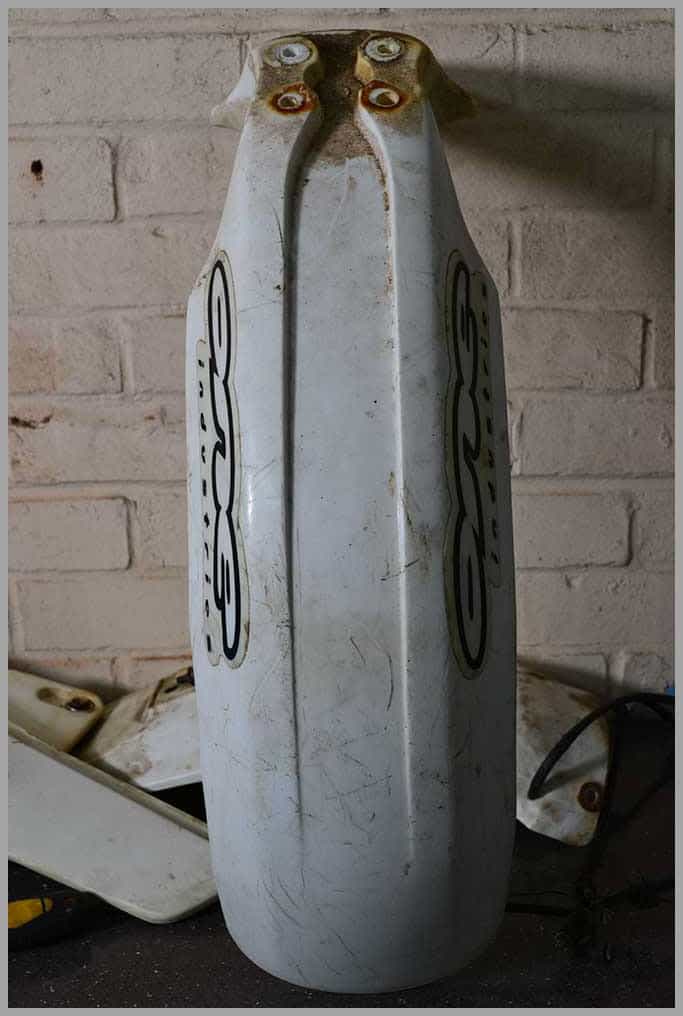
As you can see from the above shot of the front fender from my XR250, it was in a bit of a bad state. Below is a pic taken from the front to show how bad the front part of the fender was and how many scratches it has.
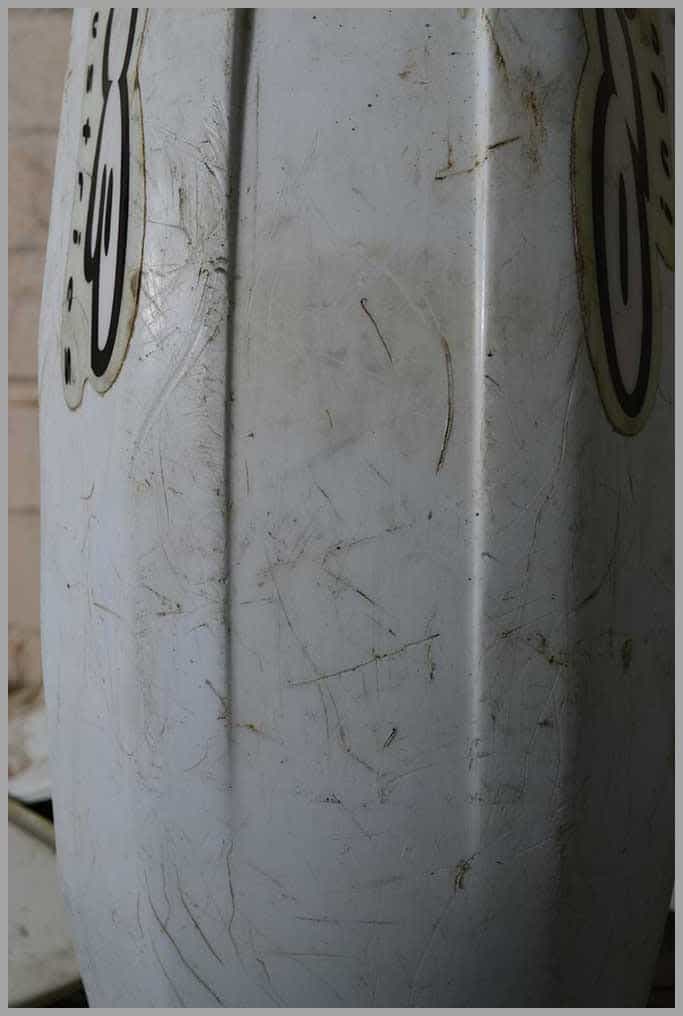
You can see quite a few bigger and deeper scratches so I was unsure as to how well the overall result would be.
Dirt Bike Plastic Resto Tool List
So here is a list of items that I used during the process. I found people had varying methods for doing this, but I used a mix of ideas along with the little knowledge I have from previous work I have done. (Notably bathtub repair where I had to fill in chips and cracks, sand using different wet and dry grades to create a perfectly smooth surface and finally polish to achieve a show room look.)
Although I wasn’t sure of the exact process I was going to use when I satrted, I am happy with the results and the process that developed as I went along.
So the tools…
- Sponge with attached scourer on the backside
- Hot water and dish soap for intial wash
- Stanley knife blade
- Wet and Dry Sandpaper (120g -1200g)
- Buffer pad (and drill or buffer machine)
- Polish Compound
Step 1 – Bath Time
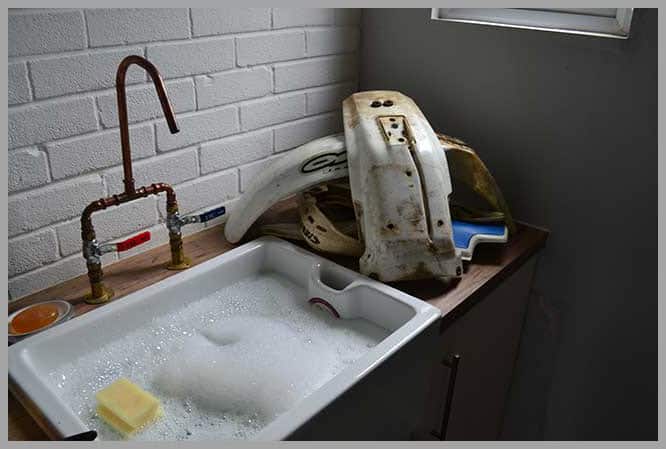
For this make sure all the fixtures and fittings are removed. The only things I left on to start with were some rubber gromets which benefited from the warm water because it softened them up enough to be able to take out easily. Prior to that they didn’t want to come out, I think because they are possibly 20+ years old if they are the originals, which is likely.
There was nothing special about this stage, I simply used warm soap water, with a sponge and scourer to wash off as much mud and grim as possible.
A couple of the pieces had stickers on. For these I left them soaking for a while in the bottom of the sink whilst I cleaned another piece to help soften the glue.
You can see a plastic side panel with blue on it in the pic. There are 2 of these, one for each side of the xr and it is a blue vinyl cover. One side came off, the other wouldn’t so I left it until I could get my heat gun from work.

Step 2 – Stanley Blade for quick progress
From the picture above you can see that the front fender has alot of sratches in it. Some were quite deep and although you can use a course sandpaper (like a 80 grit) to remove these it is going to take a long time.
For this reason a stanley blade can be an affective tool. But it comes with a warning! When you scrape the platics it can be easy to catch the edge of the blade and make you judder and jolt which may cuase you to slip and put new scratches into the plastic. These are likely to be on the deeper side because of the pressure you are applying to the blade.
If you decide to use a stanley blade then make sure you go slow and steady, taking your time.
I prefer to pull the blade towards me for the most part, so start the scraping stroke with my arm extended before pulling towards my body in an even stroke. The pic below shows me working on the side of the fender where I am pushing the blade away from me. It will depend on the contours of your fender as to what works best for you.
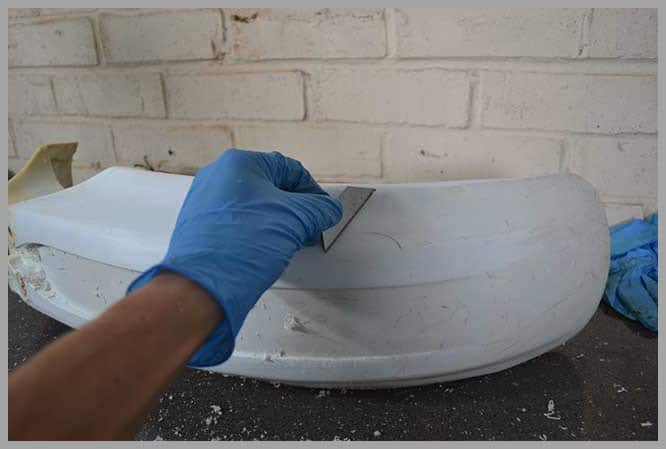
Some parts of the fender will mean you have to scrape on the width because the blade wont fit the contour holding it the other way.
You can see that you produce shavings from using the blade, and this takes off alot more off then sandpaper will do and in a quicker time. Hence it’s good for the larger, deeper marks where you have more work to do.
Step 3 – Start Wet and Dry Sanding
This is where the real work starts! Yep it is boring and repetitive and will take a while, most probably hours…. but I think it is worth it.
For the wet and dry sandpaper I started with a 120 grit because I had done the previous part with a blade. If you are not then you may need a 60 grit or 80 grit. You want to start with the finest grade possible because it will save you work.
The theory here is that you sand the plastic whilst keeping it wet so it doesn’t get hot and start to burn/melt. The grit relates to the amount of particles per square inche on the paper, so lower grits (60 and 80) are course and higher grits become finer as they go up.
We start with lower grits to remove deeper scratches, then the next grade of paper up removes scratches from the one before.
Doing it in stages like this gives us an even surface and easy method. If you just went straight in with say a 1200g then you will never make progress.
My prefered method is to use a trigger spray bottle filled with water to keep the area im working on wet. Another way is to continuously dip the sandpaper in a bowl of water.
I start on one side of the plastic and work round in either clockwise or anti clockwise direction, keeping the same direction throughout. Sanding in longer strokes where possible will minimise the risk of creating an uneven surface. If you sand in a focus spot without doing the surrounding area then you will end up with a lower area.
By rotating the fender in a the same direction will help you keep track and maintain an even surface. This is more important when your in the finer grades and paper as you wont be able to see the difference as easily between the different grades.
Tip: Wash the plastic between each grade of paper
Rinsing off the plastic after finsishing with a grade of sandpaper before moving on the next will mean you wont have any grit on the plastic that has come off of the paper before moving on to the next. If this does happen then you will be chasing your tail.
Step 4 – The Polishing Stage
If you are following along, by now you should of eliminated all scratches from your plastics and moved up through the wet and dry sandpaper grades until you get to 1200 grit.
The result at this point should be pretty good compared to when you started. But to finish it off you want to polish it to put some shine back onto it.
For this I experimented with an electric buffer and also a drill attachment. I can say that there is no real difference.
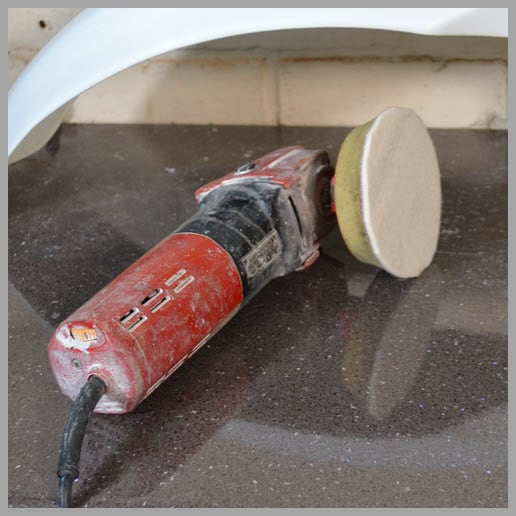
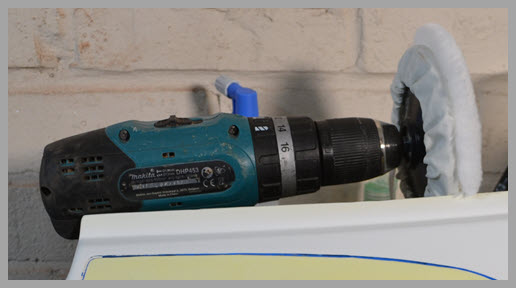
Most people would likely be using the drill with attached fluffy buffer because you will probably already own a drill and the attachement doesn’t cost more than a few quid. You get get them here on Amazon.
Make sure the plastic you are buffing is completly dry and apply the drill.
Tip : Keep The Buffer Pad Moving
If you leave the pad rotating in a single place for to long then it will build up enough heat to start melting the plastic. This will start of looking like a smear or smudge. Avoid this by keeping the pad moving so it doesnt get that chance.
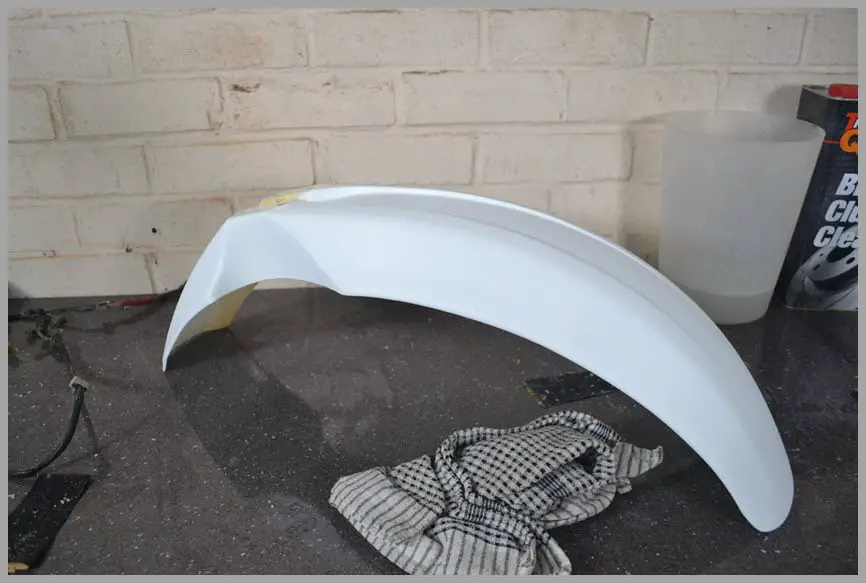
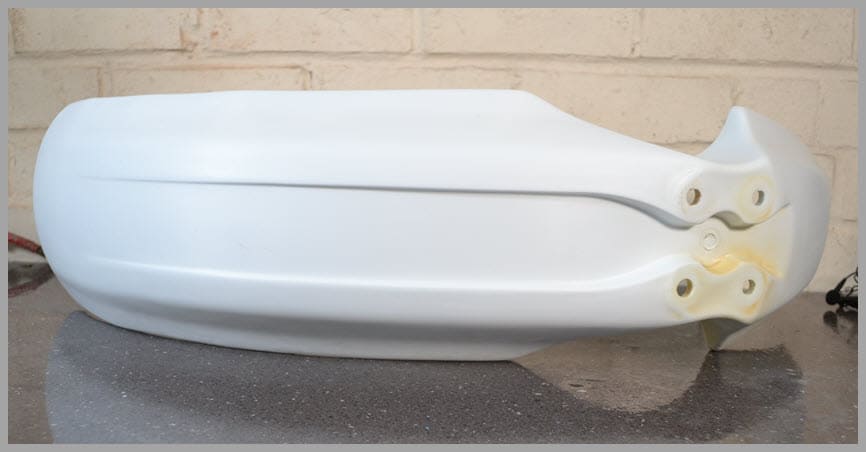
The Results: Lets See It
It would of taken you a few hours im sure but I hope you agree that the end result is worth it. Below is a pic of the fender before follow by a couple of my finished first attempt and I’m satisfied.
If you have had a go let me know how you got on and if you have any secret tips.
Check out my post about preping plastics to apply graphics