The process for restoring a plastic gas tank is straight forward a logical but it does take a few hours of hard graft if you are going to do a proper job.
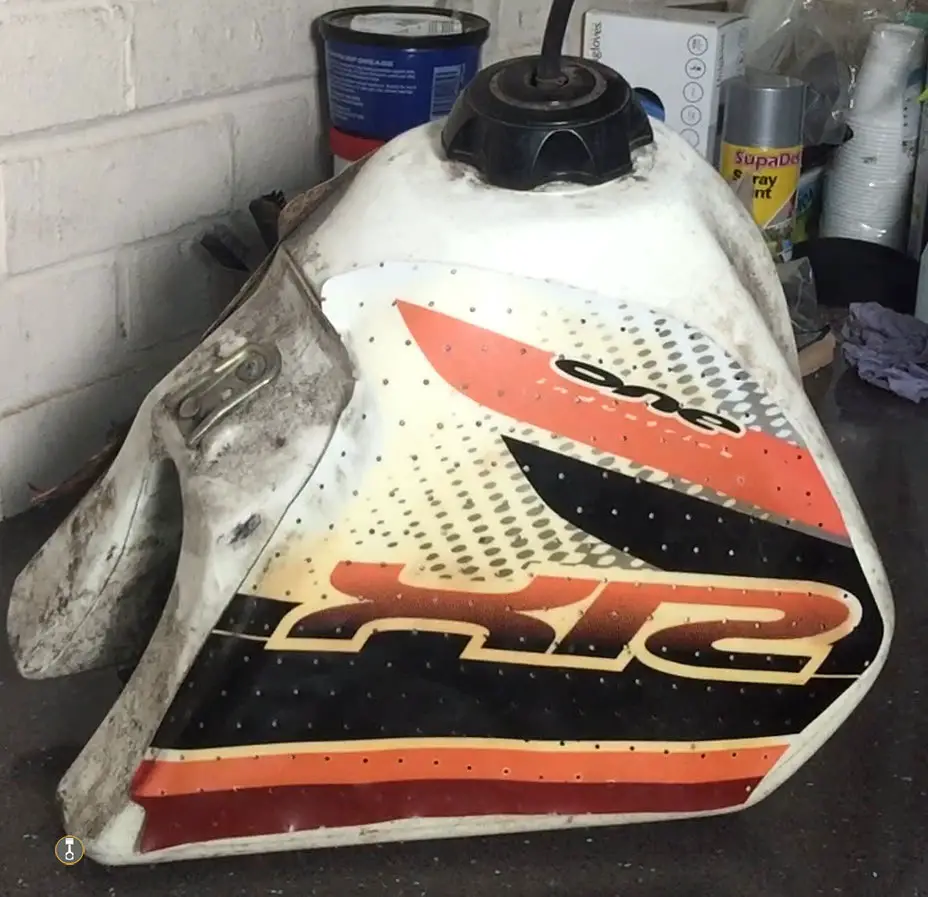
I have just restored my plastic tank on my XR 250 and it’s not my favourite part of the rebuild that i’m doing on my 1991 XR, however it is totally worth it and the bike needed it.
My Plastic Gas Tank Restoration Process:
- Remove the tank from the bike
- Remove tank brackets and fuel petcock
- Remove any old tank graphics
- Wash and degrease the tank
- Starting sanding with 180 grit wet and dry to take out any scratches
- Work up through finer grades until you reach a 2500 grit
- Polish the tank using a wool pad attachement on a drill
- Install new graphics
- Clean and refurb tank brackets and fuel petcock
- Reinstall fittings and mount to the bike.
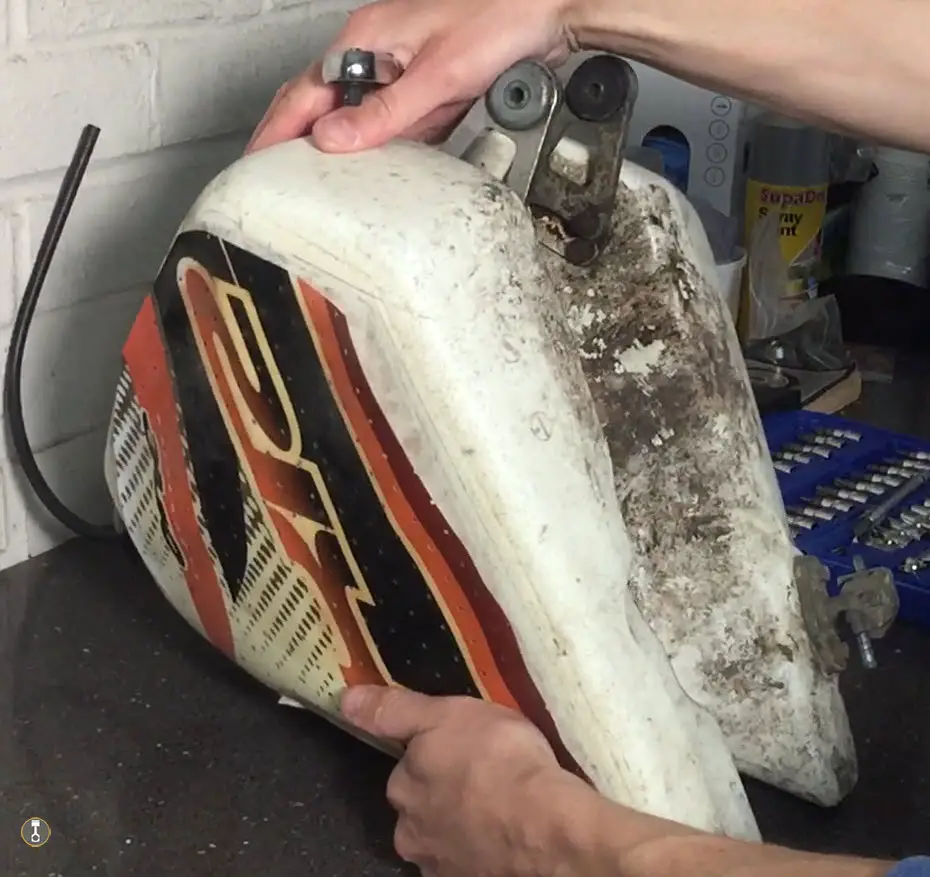
Step 1: Remove The Tank From The Bike
You will likely need a socket set with a socket around 8-10mm for the nuts and bolts that attached the tank to the frame.
On the XR you undo the bolts on the brackets and these come off with the tank. You cannot undo the brackets from the tank first off because the you can’t get to them. If your dirt bike isn’t an XR then you maybe able to but I suspect not.
It’s a simple process so I won’t be going into details. Just unbolt the tank brackets from the frame and ease the tank off. You will also need to pull the fuel pipe off of the pet cock.
Obviously keep any bolts to the side for cleaning prior to re-installation. Personally I like to chuck them in a white kids party cup and use a black marker to note where they were from. This way it’s easy to get everything back in the right place.
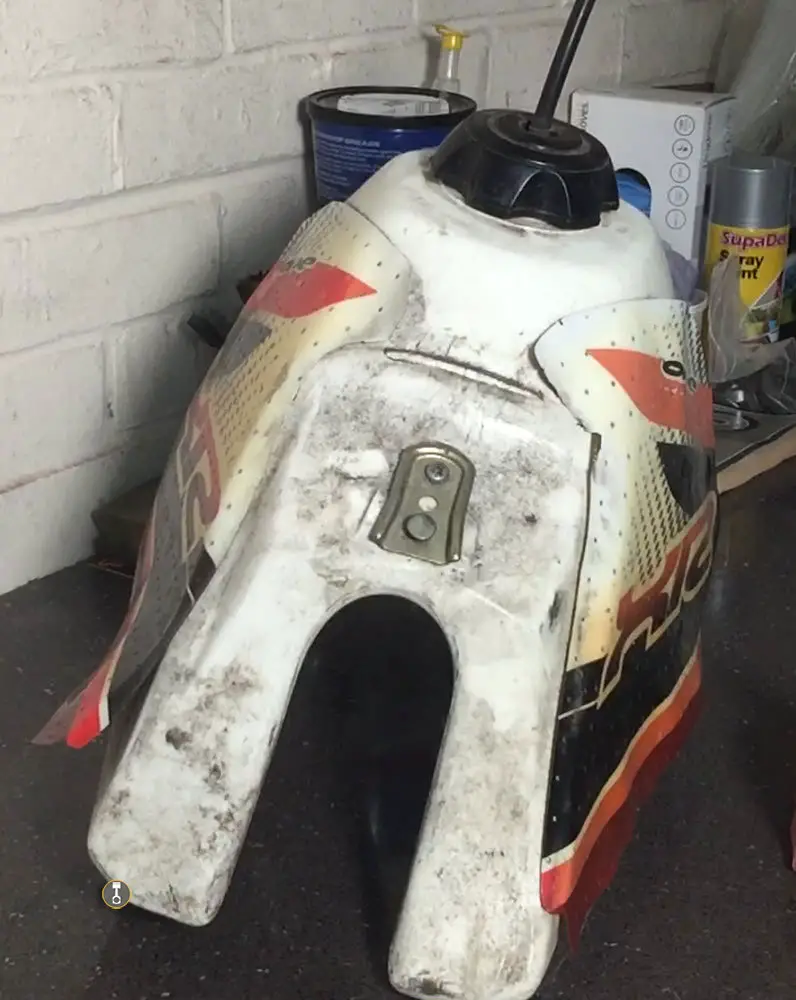
Step 2: Remove The Brackets and Petcock From The Tank
The brackets should now be accessible to be removed from the tank. WD40 will help any stubborn fixings.
Depending on your level of restoration you might want to refurb the brackets and fixings, or you may be happy with a clean. I done a refurb which meant cleaning, sanding and respraying a couple of parts because I can’t see me ever taking this tank off again. – Step 9 explains this in more detail.
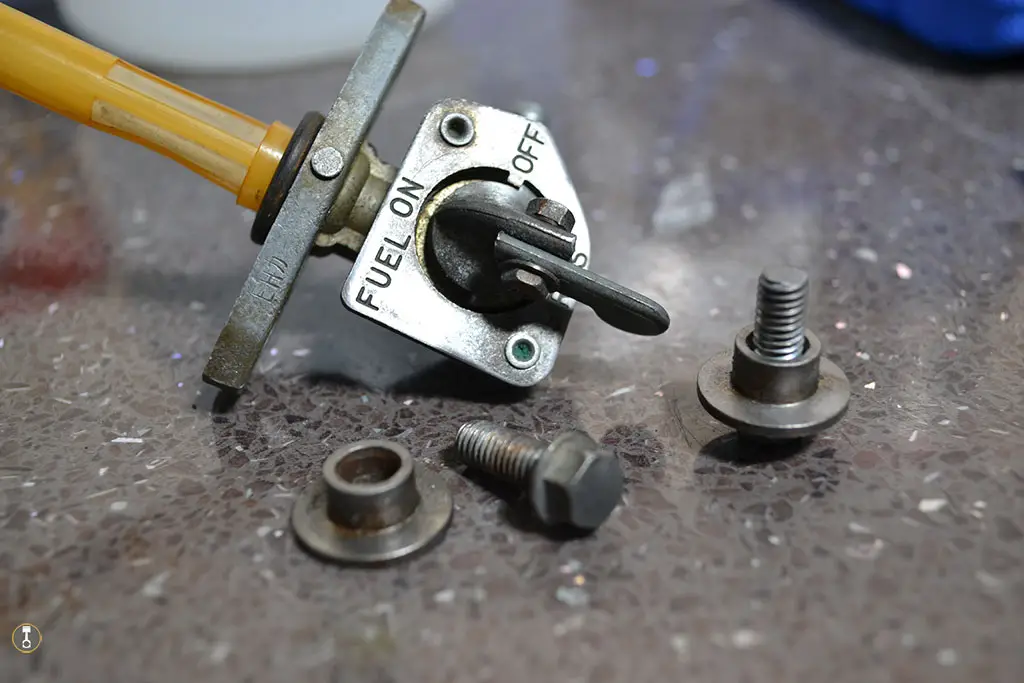
The petcock is held in by a couple of bolts and just pulls out of the tank and again is set aside for cleaning.
Step 3. Remove Old Tank Graphics
When you have a plastic tank the graphics can discoulor and in some cases peel away from the tank. This is the cause of leaving fuel sat in the tank when the bike isn’t in use.
I generally drain the fuel from the tank whenever the bike isn’t in use for anything longer than a couple days. This drastically helps prevent this.
This is also the reason that alot of modern graphics/vinyls are perforated. The many little holes are designed to allow the fumes escape that would otherwise build up underneath.
Depeneding on how well your tank graphics are still intact will dictate the method of removing them. If they are like mine were then you can simply peel them off by hand. I mean they were literally hanging on so it was no effort to finish the job off.
If they are well attached then you may need to introduce a little heat to help warm the adhesive. Then using a finger nail, pry up the edge so you have enough to start pulling.
Step 4. Wash & Degrease The Tank
Use hot soapy water to wash the tank from dirt and vinyl adhesive. Do not use anything that can scratch the tank because this will just make work don the line. I like to use a sponge elbow grease.
Dry it off then clean it again with white spirit and a cloth. This will further degrease it and help clean any of the more stubborn stains the hot soapy water didn’t get off.
Steps 5 and 6. Start Sanding: Wet and Dry 180 grit – 2500 grit
This is a standard process for body work in the automotive industry and it works here to. It is your choice as the to grades you decide to use but there are a couple of things to note.
Your starting grade wants to be as fine as possible whilst still course enough to take out the deepest scratches. A 180grit is usually a good starting point for this but if you don’t have any deep scratches then try starting on a finer grade, like 240 for example.
The other thing to note is the finishing grade. I use 2500 grit for this. The idea of moving up through the grades is that each finer grade removes the sctratches made from the one before, but you can’t just go from 180 grit to 2500 grit because it is to fine to be able to remove the scratch marks. That is why you move up through grades.
Once you get to the higher grades it can be hard to notice any visible difference and at around 1000-1200 grit it will seem very smooth and maybe finished.
However you will not be able to achieve a shine until you get upto the 2000+ grades and you can’t skip grades for reasons just mentioned.
My grade increments go like this:
- 180g
- 240g
- 320g
- 400g
- 600g
- 1200g
- 1500g
- 2000g
- 2500g
Tips for sanding:
You should be using a bucket or spray gun with soapy water to help sand. Either spray the tank of dip the sand paper into the water and dont be shy with it.
Inbetween each grade, make sure you wipe down your work area and change out your bucket of water. This is so you don’t have any grit from the previous grade which may have fallen off and can get back onto the tank.
Plan to break up the sanding process because doing this from start to finish is a hard slog. I like to do a couple of grades at a time over the course of a few days. If nothing else you will get aching arms.
Finally don’t rush or be tempted to skip any steps. It will be worth it…I promise.
Step 7: Polishing The Tank: Get The Shine Back
Once you have finished with the wet and dry it is time to polish the tank back to a shine.
For this an attachement on your drill works well. You just set your drill to a low speed and evenly polish the over tank whilst dry.
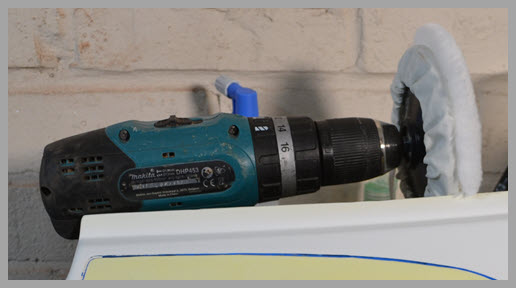
There is another test of patience here too because having the speed setting on low can feel like you could you get it done quicker on a faster setting. The thing is with doing that, is you will generate heat on the plastic and it will ‘burn’ a mark into it which is undoing the hard work you have done up until this point.
Have patience with the drill and keep it moving to avoid hot spots and the shine will appear.
Step 8: Installing The New Tank Graphics
Things are starting to take shape now and a fresh pair of tank decals will finish it off. To find out how I installed my tank graphics then check out my post here where I wrote up my method for installing the background graphics on my XR. The process is the same and it’s not hard to master.
Depending on your bike and the design you want on the tank graphics can be easily found on eBay. If however you have an older bike like mine ( XR250 from 1991 ) and you want original design graphics then you may have to hunt around for them.
The only place I could get mine did also end up being eBay, but for many of the older designs they weren’t available on eBay and could only be sourced from a niche website.
Step 9: Clean & Refurb Brackets and Petcock
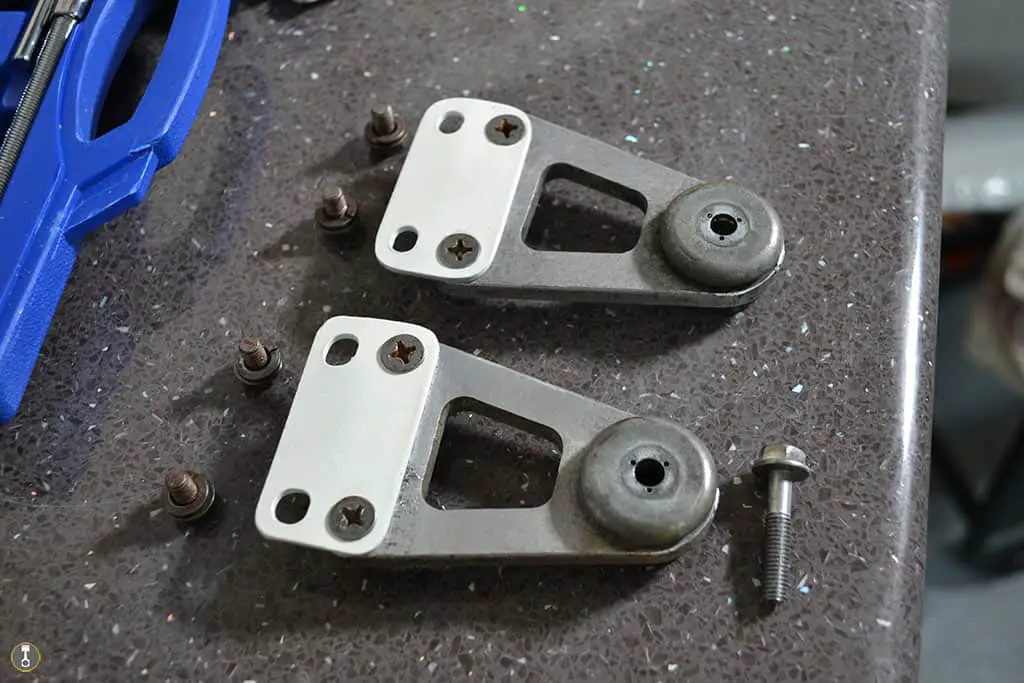
This may not be a step you are taking but as you have the tank and fittings off you may as well give them a birthday in my opinion.
The XR had 2 brackets that connected to the frame, and then 2 plates that attached to the tank for the brackets to mount onto. These parts were all cleaned using my mini wire brushes, wd40 and brake cleaner where necessary.
The plates where taken back to metal from the original white which was worn in places and had to odd piece of rust, cleaned again, sprayed with primer, then sprayed white and finally given a lacquer top coat for extra protection.
Each spray had at least 2 coats and then left overnight inbetween the next spray product.

The brackets where just cleaned, along with the nuts and bolts.
The petcock had a scrub with the brushes and brake cleaner, then buffed by hand with the cloth. You can replace the o-ring that sits between the petcock and tank but I didn’t as it looked good and has been fine.
Step 10: Reassembling Everything
Thats all the hard work complete, the only thing left to do is assemble the fittings and get the refurbed tank back on the dirt bike.
I’m sure you will agree that the time and effort is worth the final look and it gives a massive sense of pride knowing how much time and the process you went through to achieve it.