Installing these vinyl background graphics on the XR started off pretty straight forward, but it turns out I unknowingly chose the easiest panel first. The second panel was a nightmare and I had to order up another set of graphics so I could rectify a bad application, then by the third panel I had it down and I now feel confident installing them.
This is what I done from to start to finish so you can see how you might go about installing your XR background graphics. It is easy when you know how and we all have to start some where so don’t be afraid just jump in and give it ago.
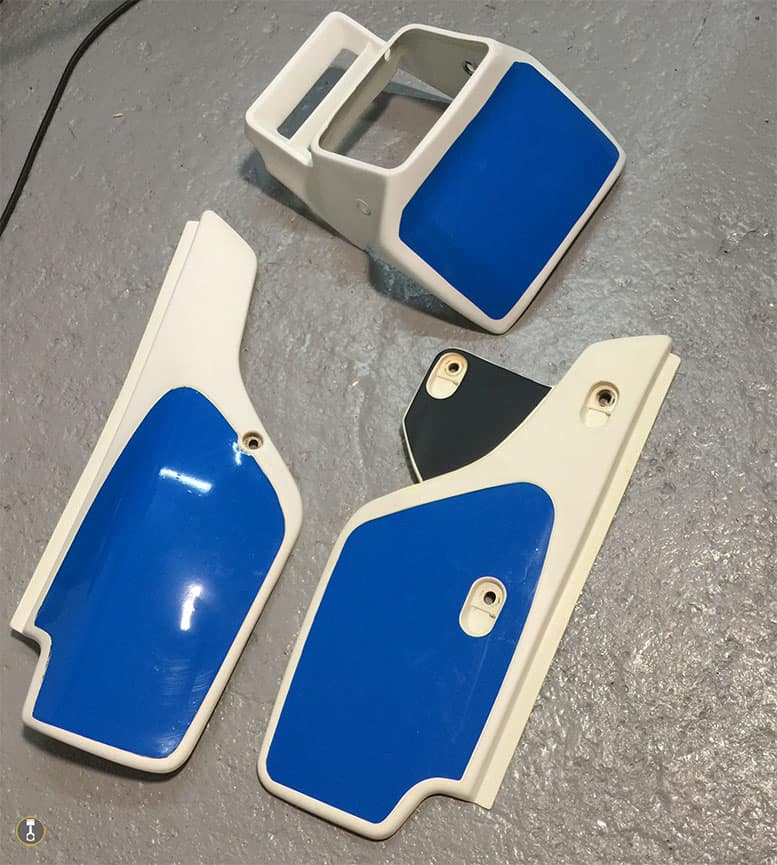
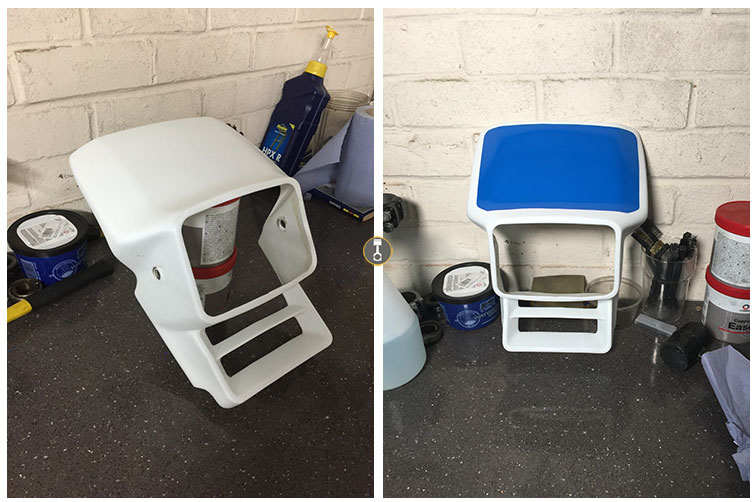
These background graphics bought for my XR were ordered from http://www.hondaxr250.com/ as a set. A set consisted of the 2 side panels in blue, the head light panel in blue and the additional black section for the left leg side panel, all of which cost me a total of £19.50 delivered.
They also ship worldwide and the price is £28.50 ($35.00) delivered. I didn’t think this was to bad at all and they were very quick to arrive, like 2 days.
At this price I don’t see any reason not to give it ago yourself.
Removing Old Background Graphics
Some people will apply new graphics over old and I know this because a previous owner to my XR had done this. In my opinion there is no reason to do this apart from laziness and it doesn’t do you any favours.
Removing old graphics is straight foward. Using a heat source like a hair dryer or heat gun on a low setting, warm the olf vinyl and pick away at an edge with your finger nail. When you have managed to start a peel then just pull in a even manor across the width of the graphic and follow justr infront with the heat.
If your lucky you will get it off in one piece but it is likely to tear. If it does just carry on with the torn piece until it is off and then start over on the remainder.
Once the old graphic is off then you will want to prep the surface for the new backgrounds and for this you have a couple of options.
Preparing Plastics For New Graphics
The more time you spend on this part the better the new vinyls will look and it will depend on how old and worn your plastics are as to how much time you will want and need to spend on them.
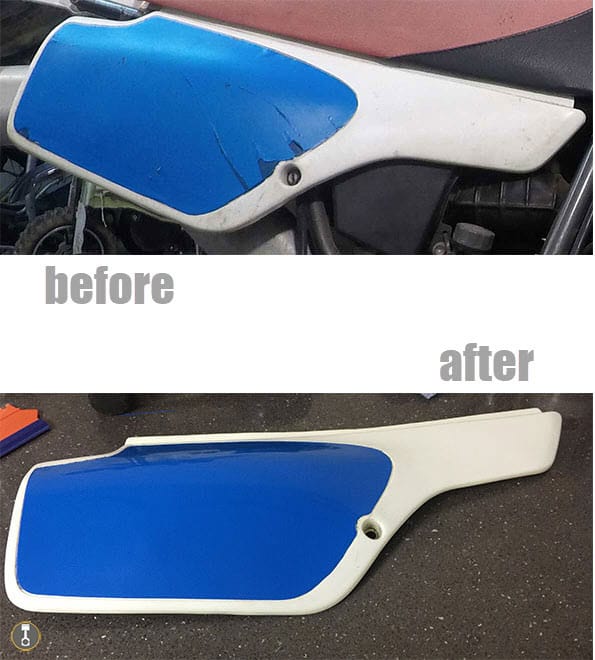
My bike is nearly 30 years old and the plastics are original so they needed alot of attention if I was going to bring them back to top form, and as they are part of my complete XR rebuild project this is the action I took.
This involves sanding out all scratches and bringing them back up through the grades until you are left with a smooth finish which can be polished to a shine and leave them looking close to new.
The full process for this I documented in another post here – https://www.projectdirtbike.com/how-to-restore-dirt-bike-plastics-4-simple-steps/
Alternatively you may be happy with the overall condition of your panels and a good clean will surfice.
Either way is the end result you should have a nice smooth surface, clear of any contaminants like dust or grit.
After giving it a wash I use white spirit on a lint free rag to degrease the panel and it’s ready for vinyl application.
How To Install The Background Graphics
I guess people have different techniques and I tried a couple. First I just used soapy water and a small rubber blade that you would normally use for grouting tiles and a stanley knife to trim any excess.
This evolved into ditching off the rubber blade because it just wasn’t doing anything I couldn’t do with my fingers and thumbs, as well as adding some heat using a heat gun, although a hair dryer would of done it. I just didn’t have one to hand.
So if you are following my process you will need:
- soapy water in a spray bottle
- heat gun or hair dryer
- utility knife with a brand new super sharp blade <—– very important
- fingers nd thumbs
- patience
Step 1: Get Your Eye In
Lay the graphic over the panel to get an idea of position. Some will use masking tape here to tape the vinyl on temporarily, place a piece at north, east, south and west. This is good for larger graphics. I didn’t do this for mine.
Step 2: Make A Start – Water and Soap
Remove the graphic and spray the panel with soapy water. If you stuck yours down then you would take off one piece of masking tape and peel the vinyl back with a view of doing half of the graphic first. Just dont crease the vinyl so you don’t get a line down it.
Step 3: Removing The Backing
Remove the backing from the vinyl and lay it over the soapy water and in as good a position as you can get it.
Again if you are doing a larger graphic then peeling off the backing you are working on and tear it away from the remainder so you do it in stages.
Step 4: Get It Stuck Down
I start in the center and work outwards, slide the vinyl around until you are happy, using fingers and thumbs to push down and expell the water from underneath when you are. The vinyl will stick when the surface underneath drys. Pushing the water out is the first step then when it is all out it drys on it’s own to complete the process.
Don’t worry about making positioning mistakes as the vinyl can easily be lifted and reapplied. Spray more water under it if needed so you can slide it about again.
Step 5: Bring On The Heat
As the graphic is finding its new home and you are making your way to the edges of the design you will start to find that you are slightly out of position and the vinyl might not be enough to get right to the edge.
This is where the heat comes in. Lifting the section of vinyl slightly and gently heating will enable you to stretch it out and increase its size.
I like to over shoot the edge a little then trim back for a perfect finish with the knife. ( Don’t cut it yet though)
The new blade is important because a used blade can cause the cut to catch and tear, crease or pull the vinyl leaving an wound beyond repair.
You may have to manipulate the same section several times in the same way because the vinyl will shrink back a little when cooling.
Step 6: Ironing Out The Creases
Another thing that will very likely happen is creasing. Unless you are laying over a perfectly flat panel you will get always get creasing as the vinyl is laid over a contour.
Using the heat and stretch method in step 5 is the way to get these out. It can take a little pratice before you get familiar with how its works and you perfect it.
You will normally end up chasing the crease out the the edges to totally eliminate them.
Step 7: Bubbles Under The Vinyl
Now your background graphic should be in place with crease out and the the graphic all the way to the edges.
You may find that the odd bubble rises up after you thought you had it sorted.
This is nothing to worry about. First get some heat over the bubble and warm it. Alot of the time small bubbles will rise a tiny bit with the heat and then dissapear as it cools back down.
If this doesn’t work then you need to chase it out the the edge like a crease and for this I like to heat the bubble and the path I want it to take, then use a finger to massage it out.
Step 8: Trim It Up
Once you are completely happy with the install it is time to trim it up. Using that brand new blade trim away any excess to leave a noce tidy finish.
Dust Under The Vinyl
Now that your new background graphic is installed on your panel you may notice small pimples underneath. This is why you need a clean panel and a clean enviroment to work in. Even though you prep and clean the panel prior to install you may still get dust underneath which can come from anywhere.
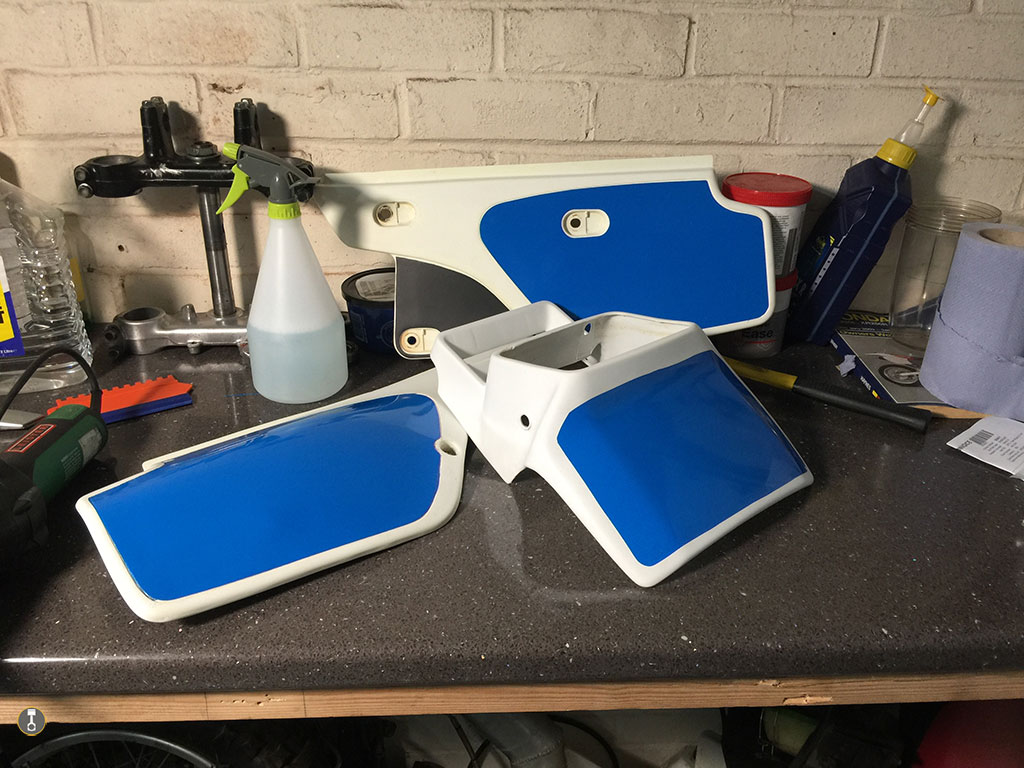
Try to think about where you are installing your vinyl. The kitchen is a good shout compared to a garage where there is likely to be alot more dirt and dust. When you use the heat gun, or hair dryer, dust is going to get blown about.
You have the option of living with the result of dust underneath or go back and peel back the vinyl to try and remove the culprit and reapply the graphic.
Good Luck.