Brake pads should be replaced after they have worn down to the indicator line found on each indiviual pad. The amount of time this takes will depend on the riding and braking style, with more aggressive styles leading to more frequent changes being required due to faster wearing of the pads.
We are of course talking about brake pads found on disc brakes here, as most bikes you will come across will have these, not the older drum style brakes. Although I may do a quick post on those also as they are found on many older models which are still used today, and that includes my XLR200 which has a rear drum.
Here is a pic of a single pad, and you get 2 of these per disc, one on each side, and one disc per wheel. So 2 of these can be called a ‘set of pads’. This particluar one is quite worn. You wouldn’t replace one pad without the other as they should wear evenly.
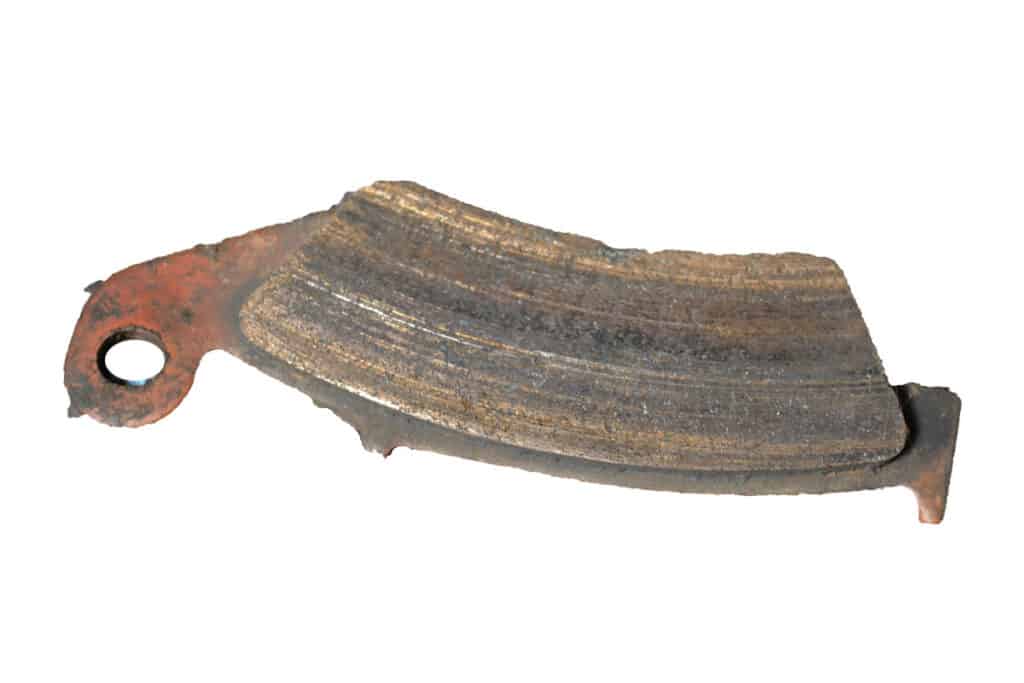
Brake pads supplied from different manufacturers will have wearing indicators in different places but in essence you are looking for a groove line in the pad and when the friction material (the pad itself) wears down to the groove then it is time for a change.
Often pads have either 2 or 3 wearing indicator grooves but you do get pads with a single groove.
The pictured pad is from my Honda XLR200 and is the same spec pad found on my Honda XR250, however you regularly get different shaped pads so don’t be discouraged if your doesn’t look quite like this. It maybe smaller, more square etc.
In most cases you will be able to see the wear of the pad without taking any of the components off of the bike. Simply eyeball and use a torch if needed to look at the pads as they sit either side of the disc.
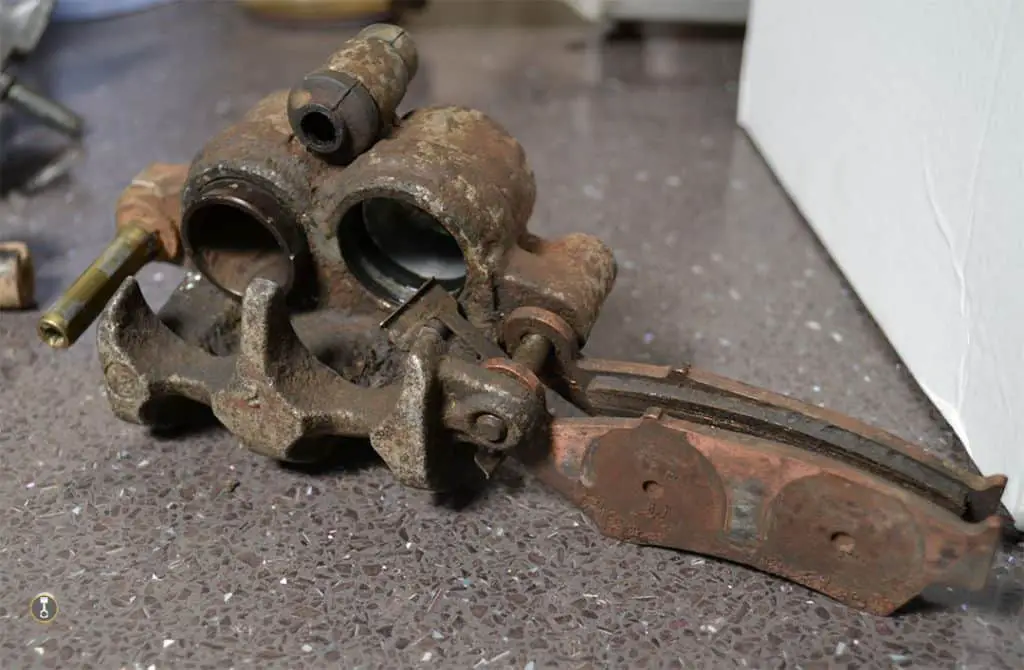
If in doubt then detatch the caliper from its fixing so you can pull the caliper and pads away from the wheel to get a better look.
For anyone unsure about taking off your brake caliper then view my post titled – How To Change Dirt Bike Brake Pads – where you can see the complete front brake assembly and it will walk you through it as part of completly changing the pads.
Other Symptoms Of Low Dirt Bike Brake Pads
The more time you have had riding then the more experience you will have of the different stages brake pads go through during the process of wearing down. From new brake pads to worn, you will gain a feel for what is right.
Here is a few different things that can happen along the way and it is very likely you will come across at least one of these in your riding career.
Squeeky Brakes
This can be caused by a few different things, including contaminated pads (like something embedded in the pad), or a glazed rotor, but this can also be caused by the pad wearing down to a certain level.
Some manufacturers will make the pad with the intention of it becoming squeeky once the pad hits a level to indicate it is getting low. This would alert the rider to check the pads with the view of them needing a change.
It may just be dust build up behind the pad so if you cannot find a probable cause then take the pads out and give them a clean, frontside and backside.
Brakes Binding
If the pads get low enough to wear past the pad and onto metal then they can lock on to the disc itself. This isn’t a great siuation and will mean you will probably be changing the pads and disc.
You really shouldn’t be letting your brakes get this low in the first place and by making it part of a regular maintenance check it wont.
Shaking When Braking
This could be a a sign that the pads or one of the pads is binding. There are also other reasons unrelated to the pads, such as a bent axle, loose caliper bolts or a warped disc for example.
Weather the issue is the brake pads or something else get this one sorted before riding. Something is definitley wrong and you don’t want to be brake-less.
Dirt Bike Brake pads rubbing
Rubbing brake pads would indicate that one component is binding on another or something is obstructing the wheel.
The first thing I would check is to see if there is any build up of crud between the pads and the disc. This could be debris or brake dust or a mix of the 2. This is an easy win if it is. Clean it out, you may have to take off the caliper to do a thorough job.
Next check… get the front wheel off the ground by putting the bike on a stand so you can spin the front wheel freely. When you spin it, look at both pads to see if one or both pads are touching the disc as if someone is pulling the lever, acting as if the brake is on.
If it is then you need to work out why. If it is stuck in that position then it could be a few things. Either way it is probably going to result in taking the brake assembly off and taking things apart to clean and inspect the components to try and establish the problem.
I think I may do another post dedicated to rubbing brakes and the causes to try and give further details on this. Or maybe a video on the youtube channel!
A problematic component should be obvious when you take it apart.
Dirt Bike Front Brake No Pressure
Disc brakes are either mechanical or hydraulic. The mechanical type are operated by a cable and these are usually found on cycle bikes and small electric dirt bikes for kids which are mostly classed as toys.
Dirt bike disc brakes are run by hydraulics using brake fluid, pressurized when the brake lever is pulled, to engage the brake.
If you are have no pressure on your dirt bike front brake then it is likely the cause of air in the brake fluid line and not always an issue directly with the brake pads.
The reason for the air could be multiple reasons and outside the scope of this post but in short the brakes need bleeding to get rid of the air.
If it is brake pad related then it could be due to worn pads so worth a check and if it is, change the pads then bleed the brakes to see if this gives you the required pressure.
How To Break In Dirt Bike Brake Pads
New brake pads should be broken in and ideally you should get instruction for the breaking in process from the pad manufacturer when you buy them.
- Ensure the pads and rotor are perfectly clean
- Ride the bike, smoothly accelerating to 30mph and slowing without bringing to a stop. This is to heat the brakes, repeat approx 10 times.
- With the brakes warm, increase the speed to 40mph and slow the bike by braking to walking pace before repeating. Repeat approx. 10 times.
- Now ride the bike by accelerating fast to 50mph before braking to a walking pace. Repeat 10 times.
- Allow the brakes to cool before riding.
By bedding the brakes like this you are infact creating a nice even, smooth surface on the pad for the brake to achieve maximum performance. A newely instaled fresh pad will appear smooth from the factory but is infact not.
If you don’t bed the brakes in then you may get a judder or bumpy feel through the handlebars as you brake. This is caused by uneven pads and/or discs which can be because of incorrect bedding.
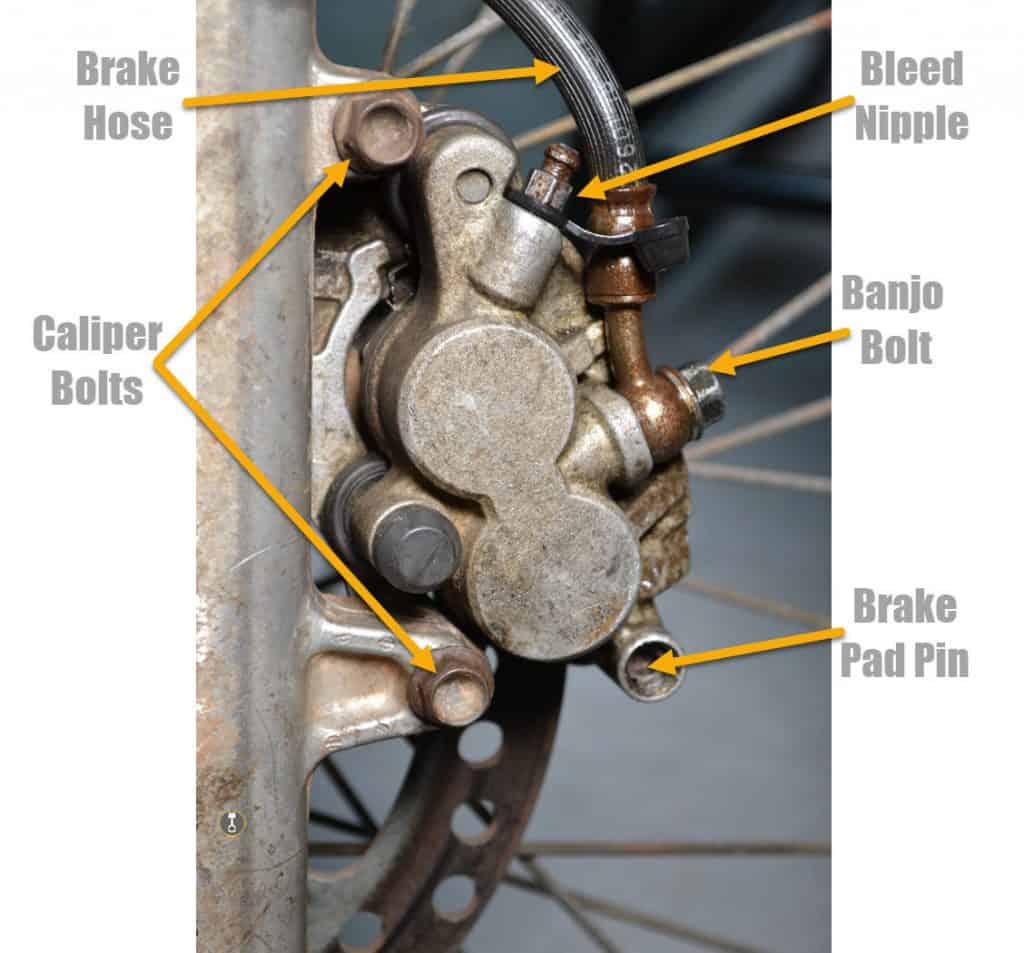
Dirt Bike Front Brake Assembly