As the title suggests, this is the second part in the process of refurbing my front wheel for the Honda XR250 Project. The first part documented the strip down process and laid out how I went about things with pics and a video showing the removal of my rusty spokes. Link to that post below.
Related Article – XR250 Front Wheel Refurb Part 1 – Strip Down
I have decided to add a part 3 to this process, because after lacing up the new wheel, the spokes need to be tightened to the correct torque setting and the wheel needs truing.
A new tyre will be fitted along with inner tube and then fitting the wheel onto the bike. All of that warrants a part 3 otherwise this post would be massive.
Navigate This Post
Front Wheel Hub – Cleaning & Painting
Front Wheel Hub – Bearings & Collar
Cleaning Rim
Lacing The Front Wheel : New Spokes & Nipples
New Items Purchased For The Rebuild
I bought the following items to complete this stage of the wheel rebuild:
- 2 bearings for the hub
- Stainless steel spoke set including nipples
- Rim strip
- Spray paint and laquer for the hub
I’ll quickly talk about the sourcing and buying of the parts before we get stuck into the build.
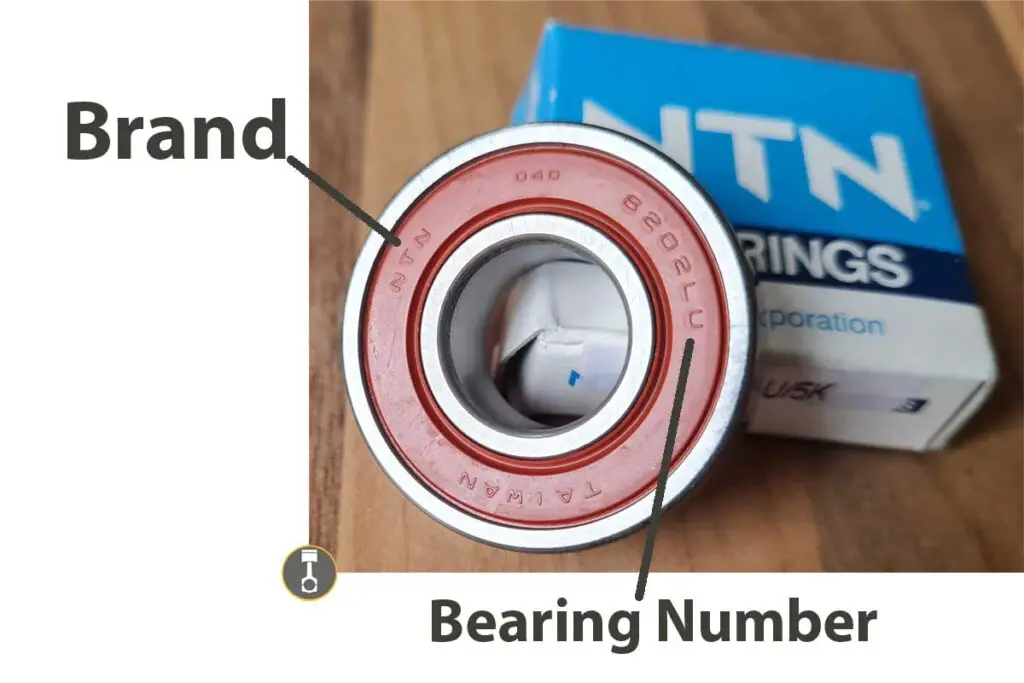
The bearings are a standard item to buy. Like with any other item you are sourcing for a dirt bike, you can either go for the original or branded manufacturer or opt for the cheaper aftermarket equivalent, and for the bearings I like to go original where I can, as I believe the quality is better.
To get the correct bearing size you have a couple of options. Firstly take a look at what the exisiting bearings are and they will have the size info stamped onto the side which you can then Google.
Next head over to a parts website – personally I always use Fowlers Parts. Here you can search for your bike by make, model and year. Then navigate to the front wheel section where you will find an exploded diagram showing the entire assembly.
Exploded Diagram – Front Wheel
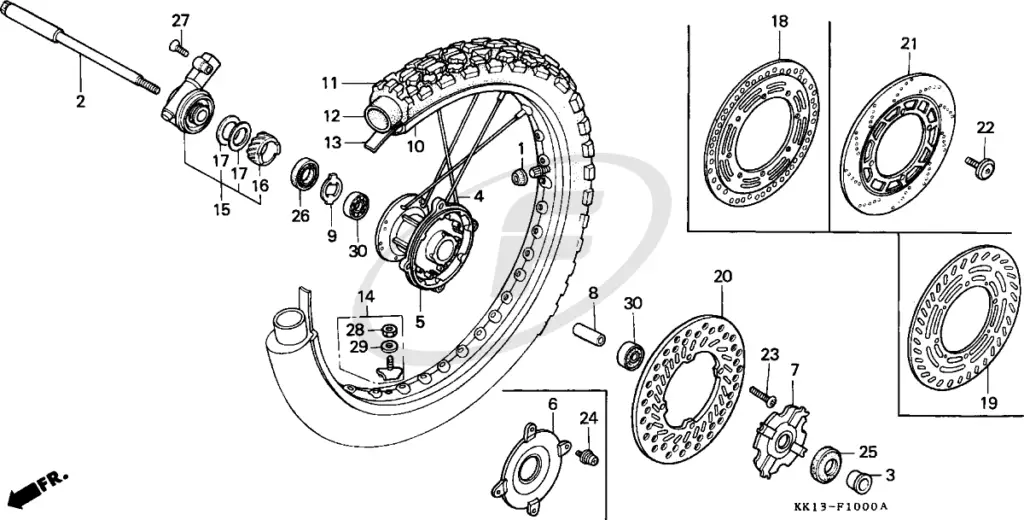
Find the relevant part, in our case the bearings, and check to see the size and details. This can be crossed referenced to see if the existing bearings were correct. If they aren’t then keep in mind that a modification could of happened previously. Otherwise I always go with the parts website.
These bearings ended up coming from an eBay shop as it was the cheapest option for the branded product I wanted. The parts websites are generally quite expensive to other online options. The brand is NTS and the bearing number was checked against the parts listed on Fowlers.
By the way if you need help sourcing parts for a dirt bike project then I did write a post about how I find parts for my Honda XR250, which as it is a 1991 model it can get tricky.
Even if yours isn’t Honda then dont worry ‘cos the methods for part hunting still apply so i’ll drop the link to the article should you want to take a look.
Where To Buy Honda XR Parts – Ultimate Guide
On with the rebuild…
Front Wheel Hub – Cleaning & Painting
This step is up to you, depending on why you are going through this process. If you are simply changing out spokes, then you may not need to replace or restore anything else.
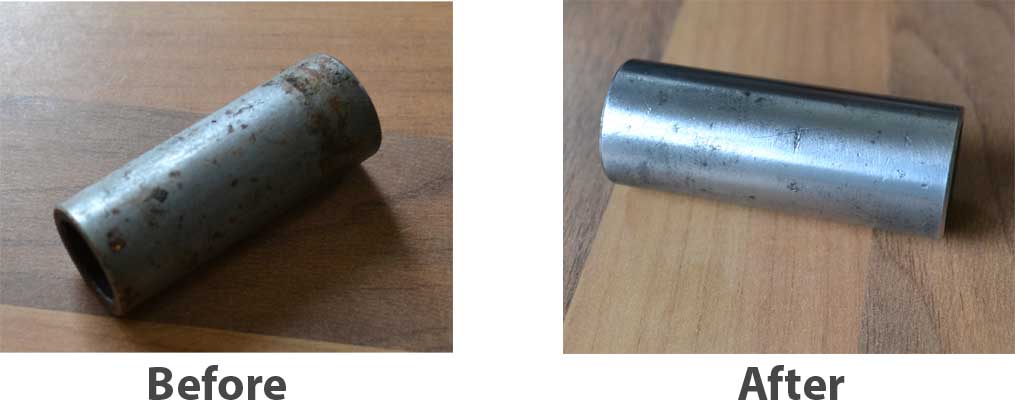
As this is part of my Honda Dirt Bike Project, I am looking to overhaul every aspect of the rebuild. This included cleaning and repainting the hub.
I degreased it and cleaned it in a bath of hot soapy water and made sure it was bone dry before giving an undercoat of primer.
A couple of coats of primer was fine, then I applied a black colour ( 3 coats) followed by a clear gloss lacquer.
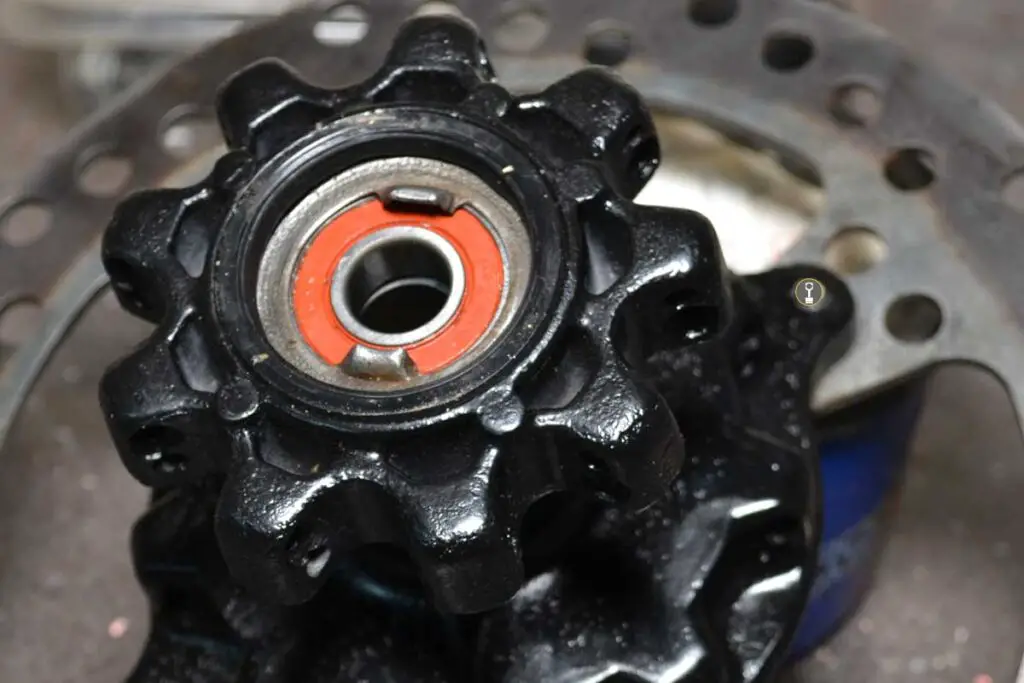
Front Wheel Hub: Bearings and Collar
Bearings can be tricky to install on some parts of the bike so for this I wanted to give myself the best chance of these going in hassle free.
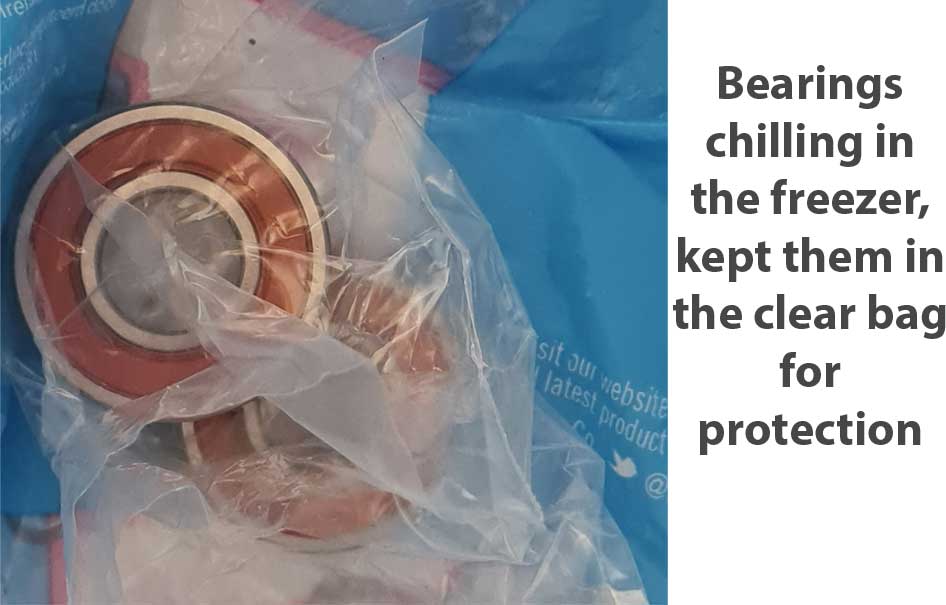
The plan is to get the bearings as cold as possible so they shrink as much as they can, then heat up the part of the hub that the bearings seat into. This will expand the metal giving us the most room and a decent chance of making it as easy as possible.
The bearings where put in the freezer to chillout for a couple hours. I’m sure you can get away with less but I got distracted by the kids and forgot about them! At least I knew they were very cold and ready when I remembered.
To heat the hub I use my trusty blow torch I bought earlier on in the bike build. This has been well worth the cash, it was cheap, came with 3 or 4 spare gas canisters and i’m still only on the first.
I rub a little grease on the outside of the bearing to encourage it sliding in and to my amazement it literally just dropped in.
I was contemplating my attack and has the vice lined up to act as a press should it of been a tough one.
The collar sits inside of the wheel inbetween both bearings and it is loose and smaller than the hole so there will never be an issue getting it in. Before hand though I gave it a quick clean on the wire wheel, then gave it a rub with grease and dropped it inplace.
I repeated the heating process for the second bearing, which also gave me no trouble at all. Happy day, and alot easier than anticipated.
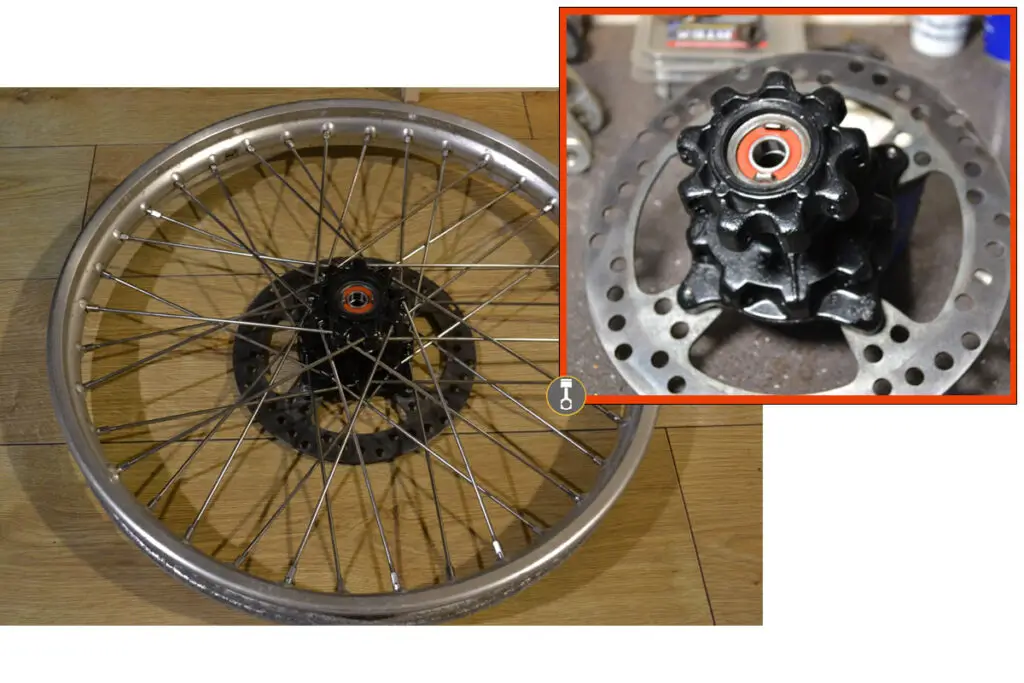
To complete this part of the assembly, I reinstalled all the other bits and bobs which can be seen on the exploded diagram. These where the brake disc, which was cleaned up on the wire wheel, oil seals, spacer collar and the gearbox retainer.
These parts all sound like they are not part of the wheel don’t they so let me quickly explain.
The oil seals prevent crap from getting into the bearing area and I’m not sure why they are listed as oil seals, I would call them dust seals but hey… im new to this.
The collar is a smaller version of what sits on the inside and is also used as a spacer, sitting between the hub and bike fork.
The Gearbox retainer is hard to explain the shape, and sits in the hub on one side after the bearing has been installed. It works with the speedo gearing and assembly.
Cleaning The Front Wheel Rim
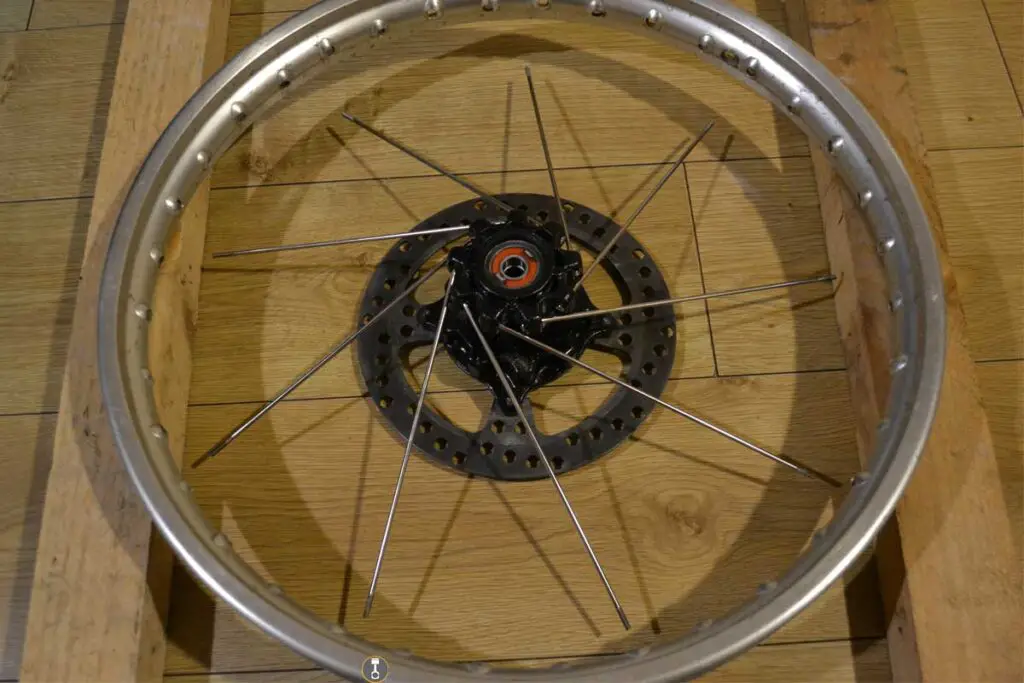
In preperation for respoking, or lacing as I have learnt it is called, I cleaned the rim which had a residue from duct tape that the previous owner would of used for the rim strip. More on that in part 3.
I just used some white spirit on a rag which makes light work of glue and similar stuff like that.
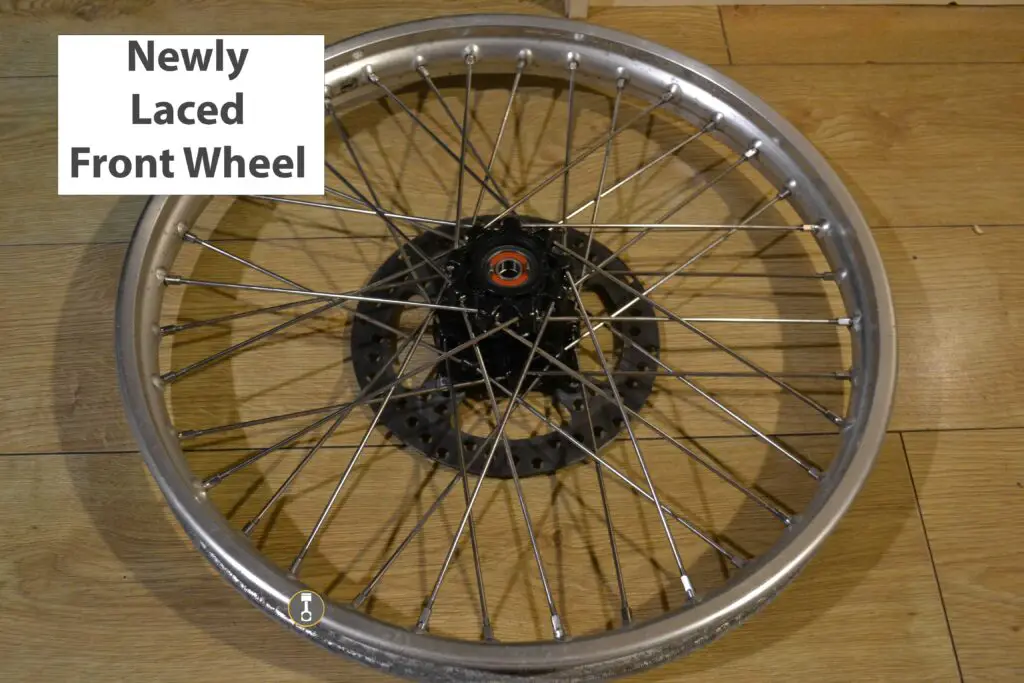
Lacing The Front Wheel With New Spokes
This was a first for me. Up until this point in my life, I have never needed to respoke or build a wheel from scratch so I was a little bit apprehensive about the process. Turns out it wasn’t hard so if you are in the same position jump right in and follow along.
My first bit of advice would be to pay attention to the way the wheel is already laced and the direction different parts of the wheel are facing. I do this with pictures and lots of them. I even checked back in with the part 1 post of this process. – XR250 Front Wheel Refurb Part 1 – Strip Down
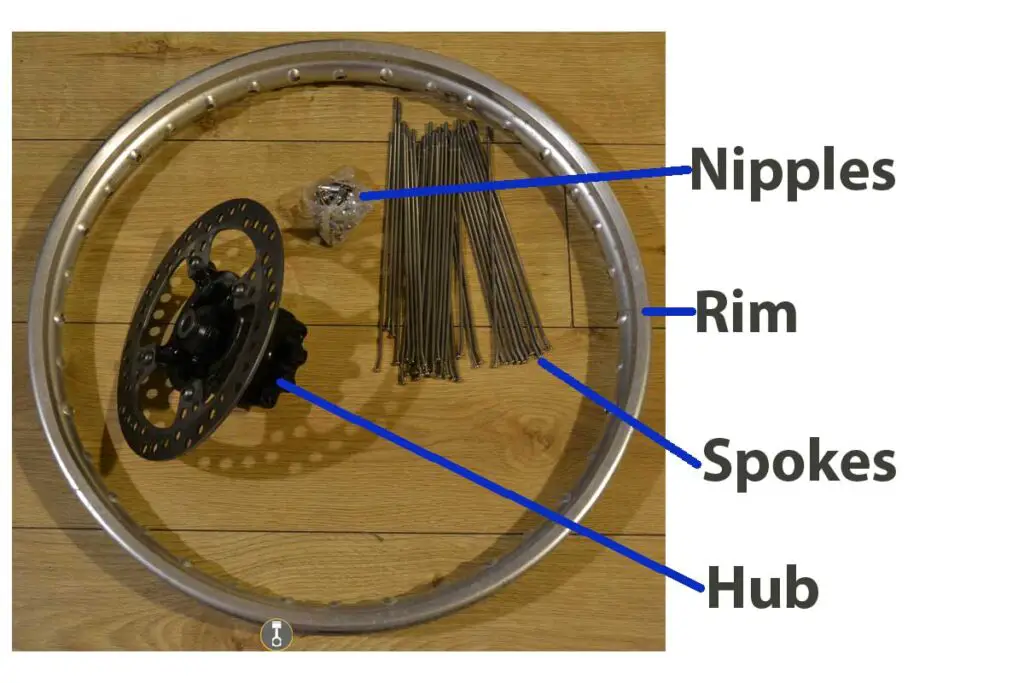
Next up I laid out all of the bits I would be using, which were the following:
- wheel rim
- hub
- spokes
- nipples
You need to make sure you get the correct spokes and when they arrive compare them against the old ones. Spokes come in different lengths and the heads have different angles. For mine, I had a total of 36 spokes and all of them where the same length and angle which made life easier.
Placing the hub in the middle you can then start by threading spokes into it. After watching a youtube video about it (see the exact video I watched a bit further down), you soon realise that by following a simple method you will get the spokes in the correct way.
This was the part is was concerned about the most, because even though I have a library of pics from the old spokes, it is hard to see exactly where every spoke goes.
By the way, when you are putting new spokes into a rim the process is called lacing .
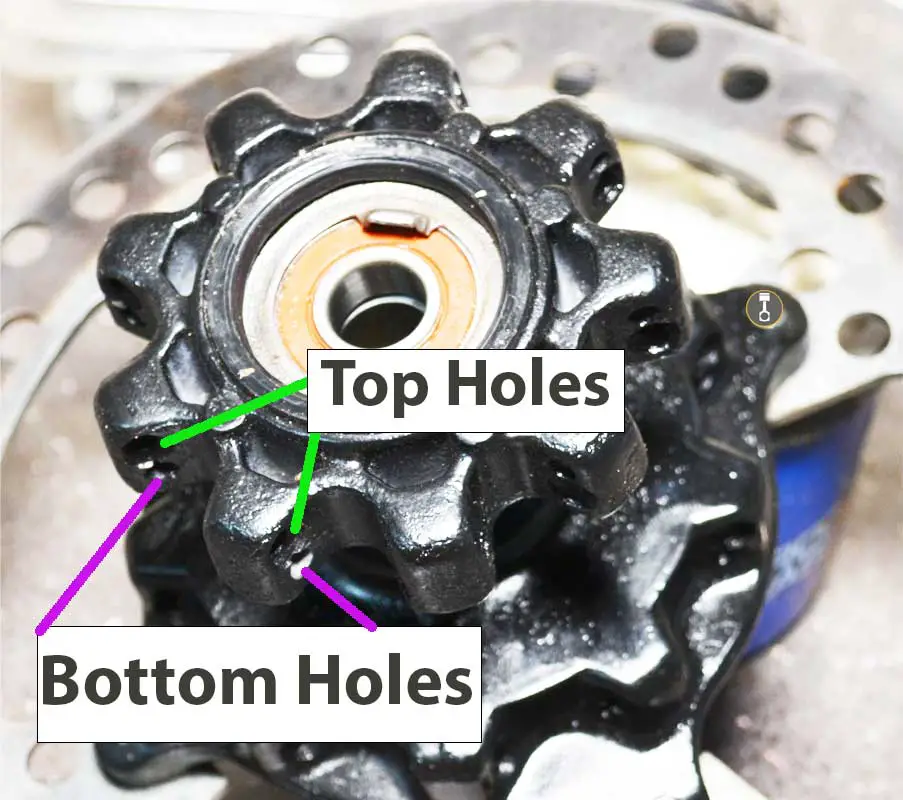
The hub has spoke holes on both the left and right , or top and bottom if you have it laid flat down. In my case, each side has 18 holes, and half of them point in one direction, then the other half point the other way. So 9 for each.
The lacing process goes like this:
- Lay the hub down flat.
- Chock the rim up using anything you have. For me it was wood. You are trying to get the rim in line with the center of the wheel hub.

- Working on the side of the hub that is now nearest to you (the top) Push spokes into the holes that you are on the bottom run first. These are the first 9 spokes in my case.
- These will aim towards a hole on the rim. The rim hole will need to be a hole that is slightly lower than it’s neighbour and pointing the correct way.
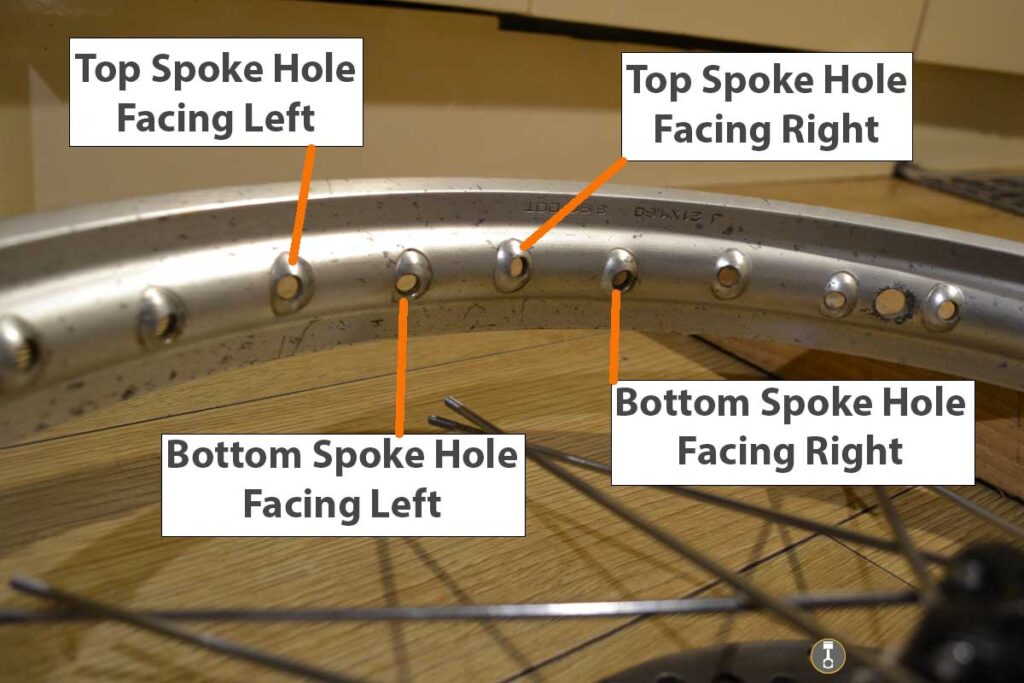
- Place a nipple into the rim and give it a couple of turns so the spoke takes into it.
- Now repeat the process for the next 9 spokes on the top part of the hub. These will go in the opposite direction.
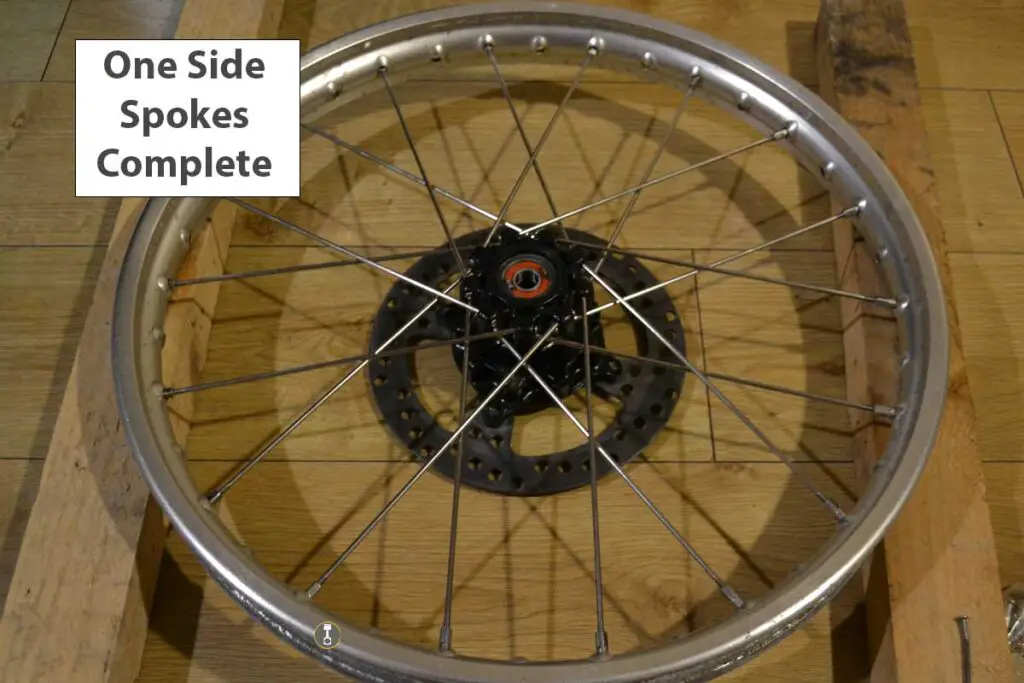
- Flip the whole assembly over, so the bottom of the hub is now at the top nearest you.
- Thread the next 9 spokes making sure you do the bottom holes first
- Align the spokes with the relevant rim hole and insert a nipple to pick up the spoke.
- Repeat for the final 9 spokes. These will face the opposite way.
Video Guide for lacing your front wheel:
That is it for part 2. Part 3 will see the wheel fully complete and mounted back on the bike. Link to that below.