Sooner or later any dirt bike owner is going to have to remove the front wheel. For me it was not long after owning my Honda XR250 and I found a crack in the rim, which led to the wheel needing to be replaced.
It is not difficult and with a few basic tools you can have your dirt bikes front wheel off within minutes.
In this post I shall go through the process for taking the wheel off with some pics to make things easier to understand, but if you have any questions then leave me a comment.
This is the corresponding video from my youtube channel.
Wheel Removal Tools
You don’t need anything specialised for this job. Likelyhood is you will have everything you need already if you are even a little bit of a handyman.
- Bike Stand
- Socket set – sizes between 15mm and 23mm
- Rubber Hammer
Get The Bike On A Stand

A dirt bike stand will make life alot easier for many jobs that you will carry out on your bike, so if you haven’t got one already then maybe treat yourself for this job and you will thank me for everything else you use it for.
Watching the video you can see the Tech 7 stand which is a robust stool made from tubular metal and has a protective rubber mat on the top. In the middle there is a hole which makes access to the underside very easy and inparticular changing the oil.
I’m not sure where I bought mine from as it was sometime ago, but this one on Amazon looks exactly the same and my guess is they just have different branding and could be from the same supplier.
Should you choose to roll without a bike stand then fine, either make do on the floor or see if you can use something as a stand for the time being, like a crate or box.
The advantage to getting the wheel off of the deck is you wont have weight on the front axel which makes it easy to take out and will save you lifting the front of the bike.
Take Off The Brake Caliper
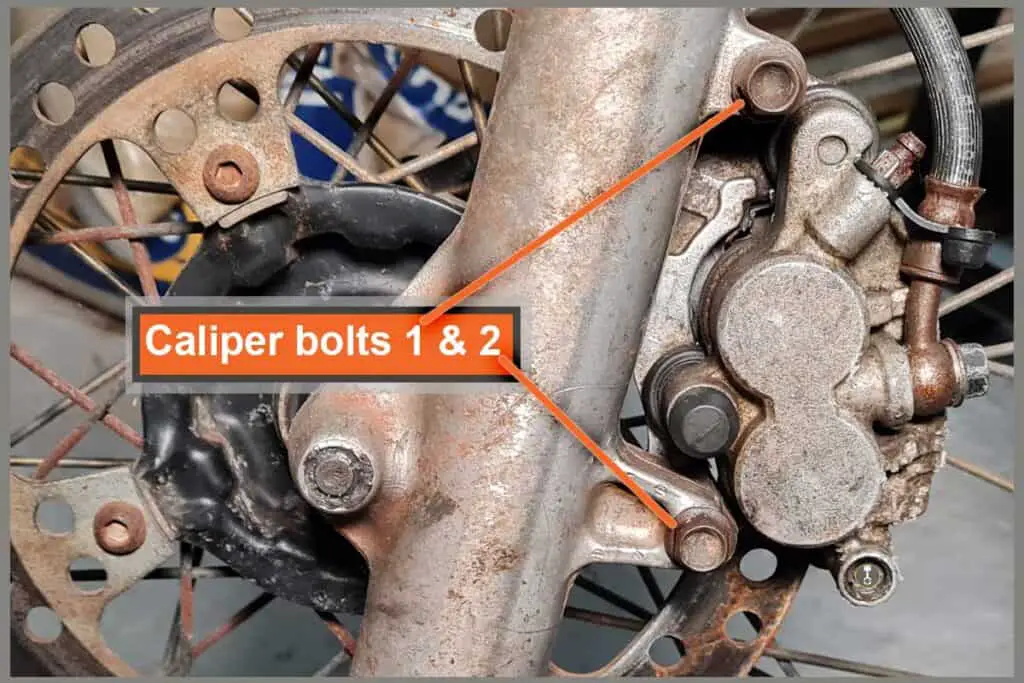
Although taking the front caliper off isn’t 100% necessary, it is the best method in my opinion and will give you the extra room when you are jiggling the wheel about to get it off and also when you re-install it.
Usually held in by 2 bolts which attach to the right side fork, these are easily un-done with a socket, or spanner and then should slide off the back of the brake disc.

Now is a good time to check the brake pads and change these if they need doing whilst you have the caliper off. If you are unsure about how to do this then check out my article showing you a step by step guide to changing your brake pads, with plenty of pics. Here’s the direct link
Undo The Pinch Bolts
With the brake caliper out of the way it’s time to loosen the pinch bolts. Different bikes will have different setups.
The XLR200 I am working with here has pinch bolts on the left side only and four in number, whereas your bike may have 2 on each side. The bolts screw down onto the plate that pinches against the axel to keep it in position.

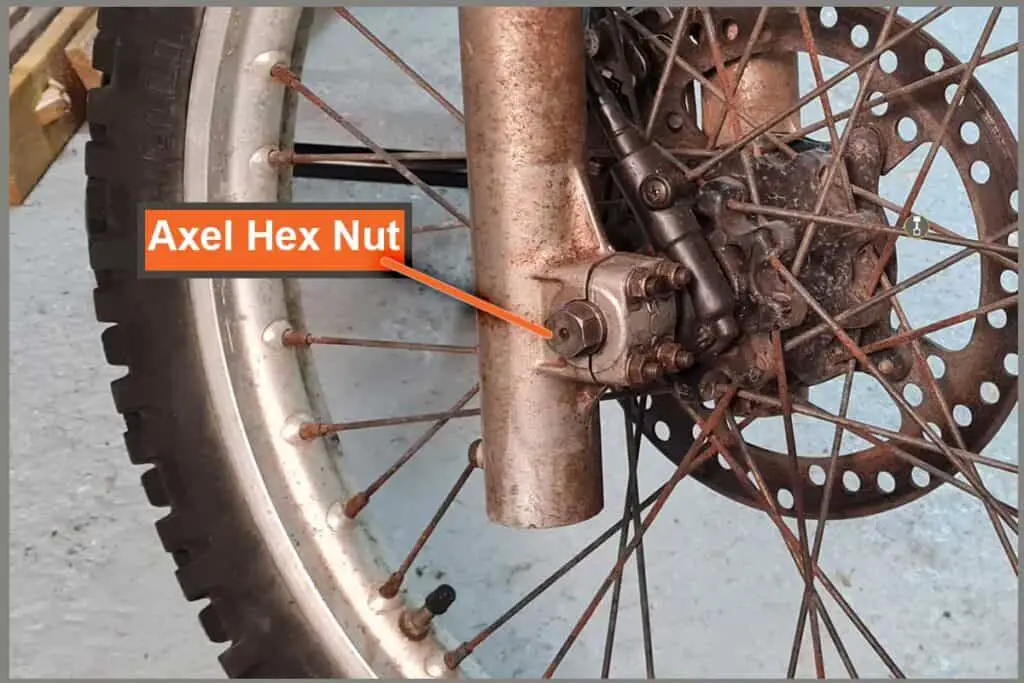
At this point it’s worth saying, if you have an axel with a nut on the end, you would undo this prior to the pinch bolts. Mine doesn’t have this nut, instead the axel threads into the fork mount itself.
Whatever your configuration, loosen the pinch bolts, but do not take these out fully as there is no need unless you are wanting to do a deep clean and/or regrease the bolts, which isn’t a bad idea every now and then.
Remove The Axel
Time to remove the axel and it will likely be one of 2 ways. I’ll dicuss the method on my bike first which will be the same as the pics on this page.
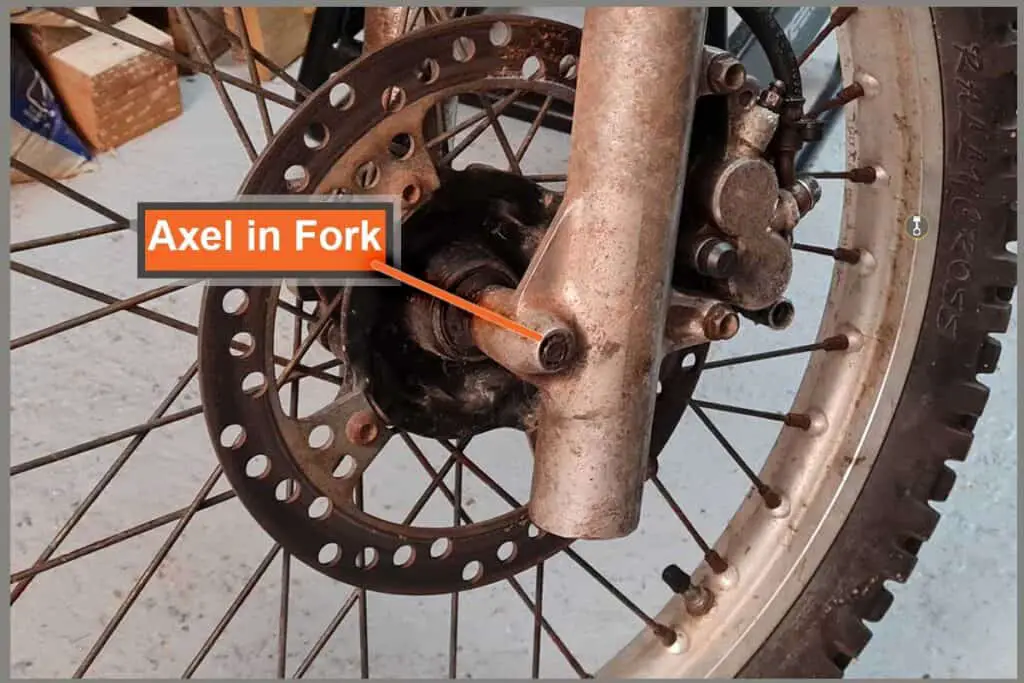
My axel sticks out with a hex shape on the end (see first pic below). This enables me to use the socket to unscrew the axel which is threaded into the fork mount on the otherside (see 2nd pic below). I unscrew the axel until it is free from the fork and then either pull it out by hand whilst taking the weight of the wheel or just carry on unscrewing allowing the motion to work it out.


The other common way is back to having the nut on the otherside. If you have this then instead of having a hex shape to socket onto, you will probably have an inset hex bolt.
You can use the hex bolt to unwind the axel then pull by hand when you have enough poking out. Or using a rubber mallet, tap the threaded end of the axel, being careful not to distort the thread.
If you dont have a rubber mallet then use a block of wood inbetween the axel and regular hammer.Hitting it with a hammer without the wood protecting the thread will often result in a damaged thread so don’t do it.
That should be your wheel off. Simple once you have done it for the first time.
