This post documents the swing arm being taken off my Honda XR250 to be stripped down, cleaned, refurbed and put back together. All of this is being done as part of my Honda XR250 dirt bike project so if you want to follow other parts of the build check it out.
I initially stripped the entire bike down in one complete sitting and taking off the swing arm was a pretty simple part of the process.
With the XR on the bike stand I removed the back wheel, then it was a case of unbolting it from the rear shock and then taking out the swing arm pivot bolt.
Swing arm pivot bolts can become seized and stuck in the frame if you don’t maintain your bike, and once that happens I have been told they are a nightmare to remove, that’s if you can get it out at all.
It is worth noting incase you are ever in the market for a second hand dirt bike, checking the swing arm pivot bolt is a good idea before committing to purchase. I have listed this as a main point to check in my guide to buying a used dirt bike. There you will find the free used dirt bike checksheet should you need it. A handy list of things to check and questions to ask to help reduce your risk of buying a lemon.
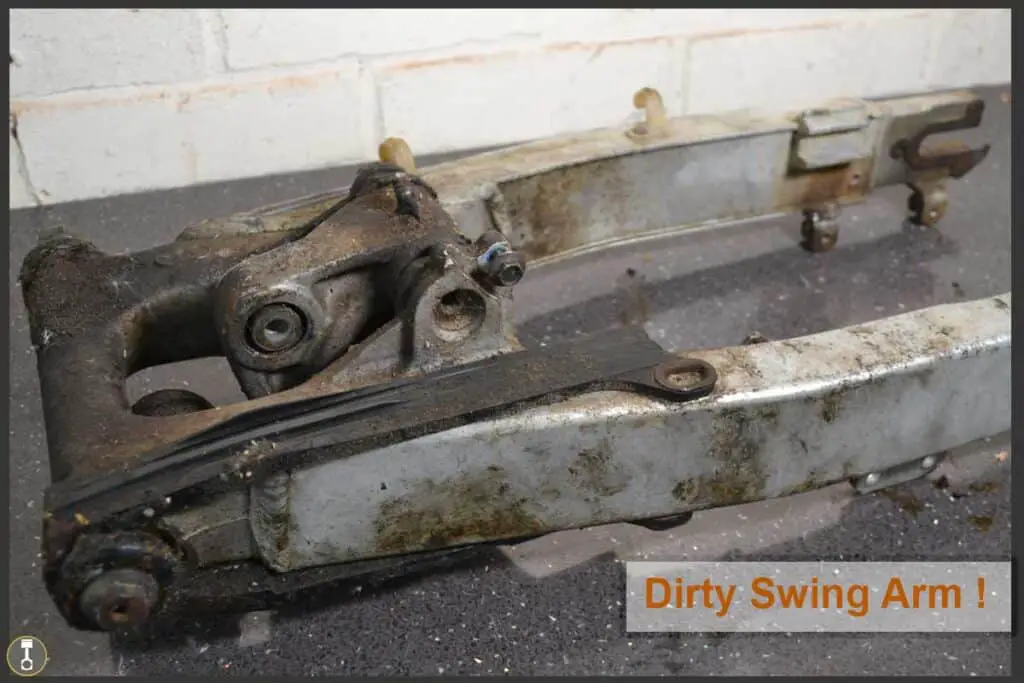
The Clean Before The Clean
When you need to clean something twice you know it’s dirty and that’s how dirty this swing arm was. I needed to clean it before taking it apart to clean it properly. I have to admit I have never cleaned it since owning the bike which is shameful I know.
I wont take credit for all this grime though as I am sure the previous owner gave it much love either because it was just as caked in grease and crud from the day I picked her up.
So with the swing arm off the bike and ready for revival I first used the basic method of having paper towel in my hand to scrap of as much dirt and grease as I could that had built up from around the linkage that holds the rear shock and swing arm in place.
Then I filled a spray bottle with regular fuel that I had drained from the bike when taking off the tank during strip down. The fuel enabled me to wipe clean the majority of the heavy dirt, grease and grime so I could then take off the different parts.

The fuel did melt the spray bottle seals within a day so the bottle had to be thrown. I know fuel is good for cleaning but giving the component a soaking in a bath style setup would be the better approach I guess.
Parts I removed at this stage was everything I could see that would come off.
- Cable clips for rear brake hose
- Chain Guard
- Chain Slider
- Swing Arm Bolt – which was only in there loose to keep safe from when I had striped the bike originally.
- The linkage that connects to the rear shock
- Little valves that are used to inject grease, known as nipples or zerks.
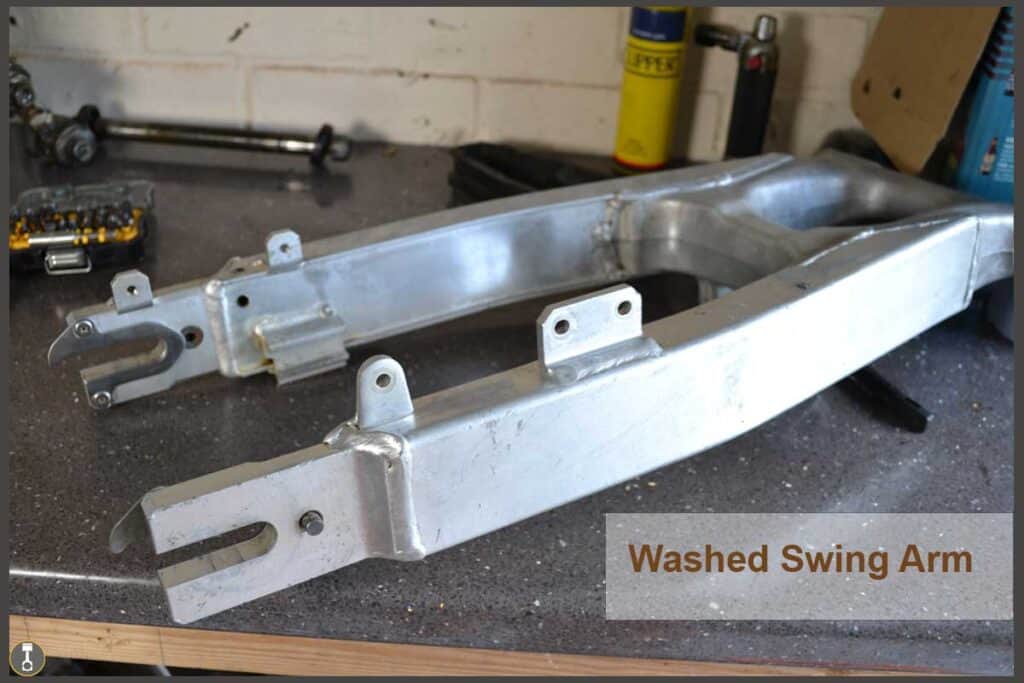
Next it was time for a good soapy clean.
Swing Arm Cleaning With Hot Soapy Water
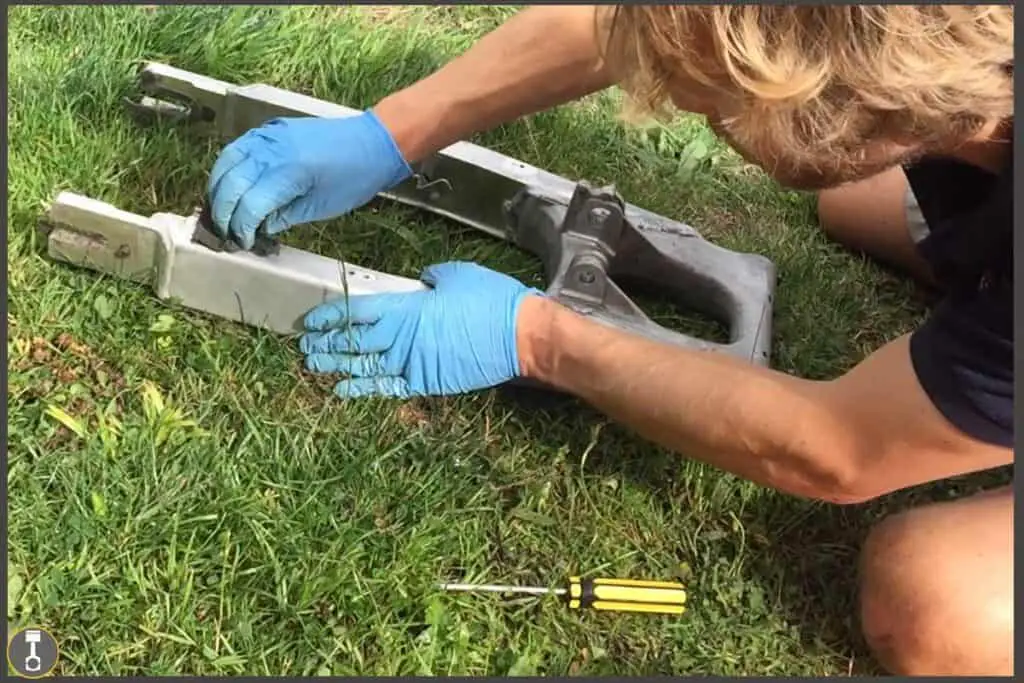
Now the masses of grease had been removed I could see what I was doing and as the sun was shining I decided to clean it outside on the front lawn.
A bucket with hot soapy water, a nail brush, a green scourer and elbow grease bought the swing arm up very nicely indeed. To be honest if I hadn’t done nothing else at this stage I would of been happy. It looked great, but then I was used to it being a complete state!
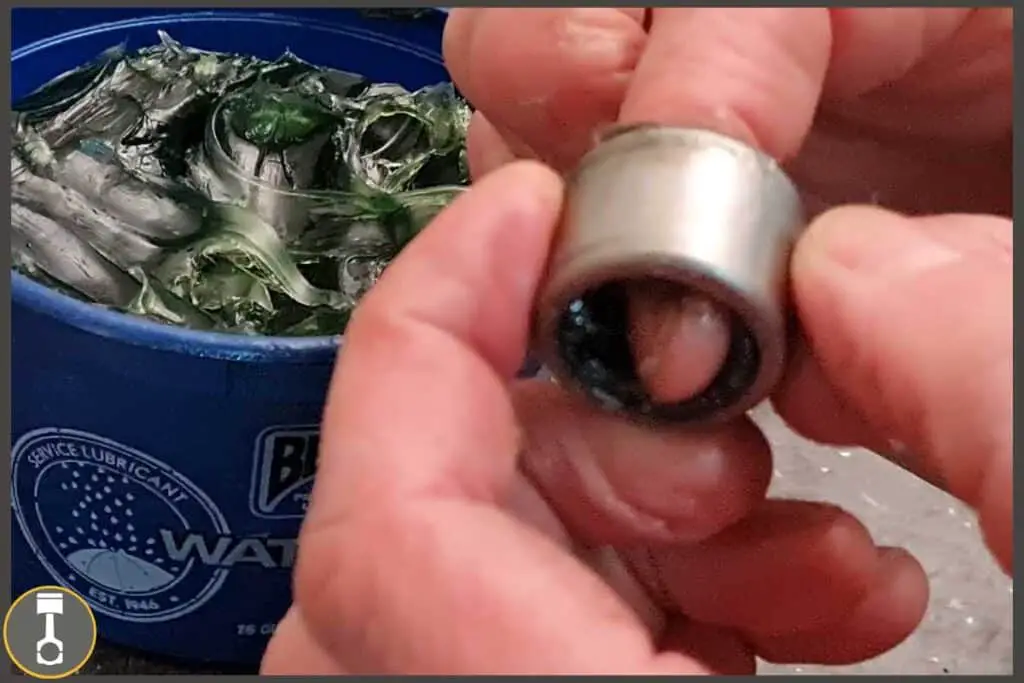
Swing Arm Bearing Removal
The bearings I am talking about here are found in the hole where the swing arm pivot bolt pushes through, and strictly speaking these are the only bearings the swing arm has.
Other bearings related to this job, and often spoken about, are found in the linkages that sit between the swing arm and the rear shock. I did refurb these as well but I shall write a seperate post to talk about the process and components, otherwise I fear this one will turn into an small book!
This whole swing arm refurb experience had pushed me into buying a bearing puller, that story is also part of the linkage bearings replacement part of the job, but long story short is I ended up buying one through frustration.
Since buying it, the Sealey bearing puller has been used a few times and I can just tell that it will become one of those brilliant investments that you know you should of bought sooner. If you want to check out the puller in more detail then you can see my review post about it here. – Dirt Bike Bearing Puller Review.
So with the puller in hand I pulled the 2 needle roller bearings out, cleaned and regreased them, also cleaned and regreased the other components like the swing arm bolt, bushing and caps then reassembled everything.
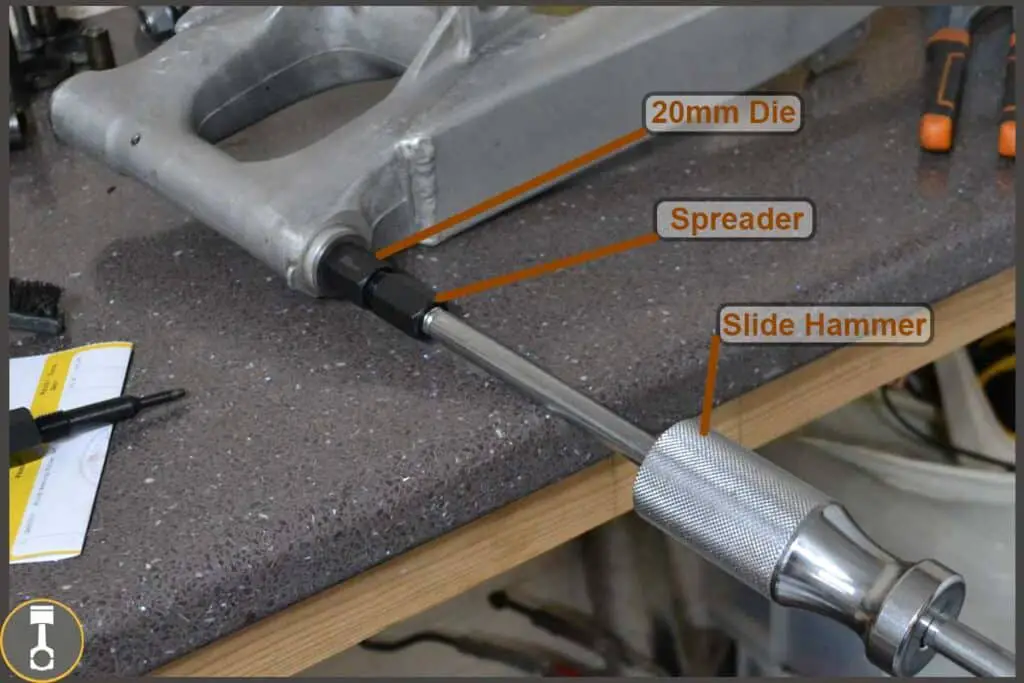
Above is the puller in action, making life alot easier then drifting out a bearing with a hammer and socket, believe me!!! You simply insert the correct size die, then you screw in a spreader which increases the size of the end of the die so it cant be pulled back out because it is now larger than the bearing hole.
Next you attached the slide hammer and start hammering until the bearning pops out.
On this swing arm you get one needle bearing on each side but on other swing arms you may see more than one bearing per side.
Scratch Removal & Polishing The Swing Arm

For some people, cleaning the swing arm maybe enough for you, then you would could just apply some new decals and put everything back together.
Personally I wanted to see if I could get it looking abit better by removing some of the aged scratch marks and then polishing it back up to see if I could acheive a look of newness.
The process for removing the scratches is the same for when I done the dirt bike plastics and the fuel tank which is also plastic on my model of XR.
Starting with a course grit of sandpaper I take out the scratches, then I select a variety of grades to work through, slowly getting finer and finer. Each finer grade of sandpaper takes out the scratches left by the one before until eventually you are on some super fine stuff like a 2000 grit. Lastly I apply polish and buff it back off with a rag leaving a nice shine.
The grades I use are as follows:
- 80 Grit
- 240 Grit
- 320 Grit
- 400 Grit
- 600 Grit
- 800 Grit
- 1200 Grit
- 1500 Grit
- 2000 Grit
That means you are sanding the swing arm 9 seperate times, being as good as you can to do a full job and not rush. It is boring and makes your arms, hands and even fingers ache because of the repetition. But the results are worth it in my opinion. Plus it’s likely you will only ever do this process once per bike so why not do it justice?
For a more detailed explanation check out my post about refurbing dirt bike plastics where I went into a bit more depth about technique. The only difference is you wont be using a blade to get a head start as we are working on metal not plastic, and you wont use an electric buffer, just polish and a rag. – How To Restore Dirt Bike Plastics
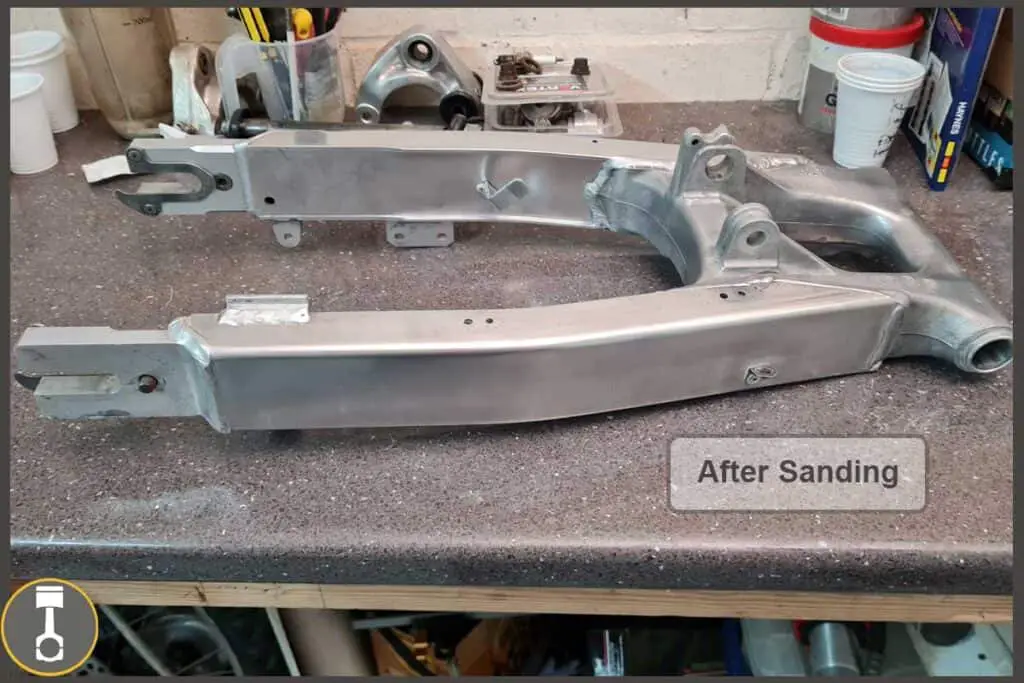
What do you think? The finish is great and ready for the decals for which I have some blue ProLink stickers ordered and should be here in time for the end of writting this post!
Reinstalling the Bearings and Swing Arm Bolt Assembly
Putting the swing arm back together is the best bit once everything is clean and ready because you are moments away from being able to assess your handy work and admire the results.
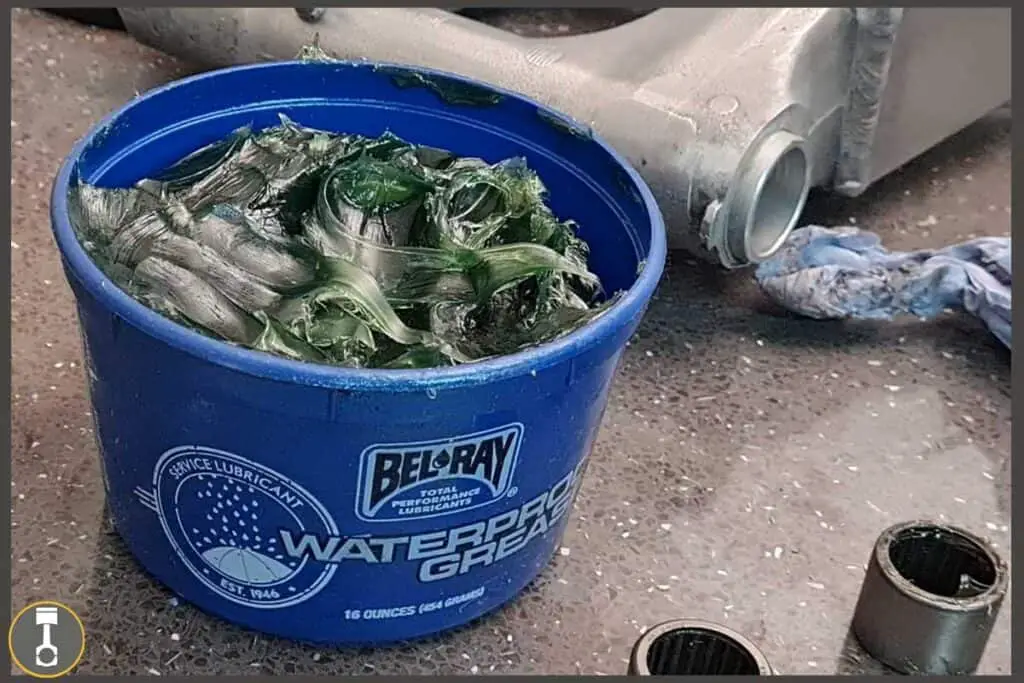
First is was the needle bearings, for which I wiped them over with a paper towel to remove any debris and as much of the old grease as possible. Then using my index finger I pushed enough new grease on that it could be seen forcing its way out of the edges.
The grease I like to use for this is a bluey/green in color water proof product from BelRay, who are well known in the industry and I like them. You can pick it up here on Amazon
Once the bearings have been greased, next up was getting them back into the swing arm and for this I use my homemade bearing driver as I haven’t yet stumped up for a proper one. I’m sure I will sooner or later.
For the homemade version I use a length of threaded rod with some thick washers and a socket. It’s hard to explain in text so I have put a pic below to help, but basically I push the rod through the swing arm hole where the swing arm pivot bolts normally lives.
Then on the end that isn’t having the bearing inserted I place one of the thick washers (which can be more than one if you want to add some strength to thinner ones you might have). Now add a couple of nuts which tighten against each other to stop the washer coming off of the end.
The washer(s) is now trapper between the nuts at one end of the rod and the swing arm.
Now on the end you are inserting the bearing: Place over the threaded rod in this order.
- The needle bearing
- Socket
- Optional Washer
- Nut
Now you tighten everything using a spanner on each end of the rod. As the setup clamps the swing arm the bearing is pushed into the hole. The socket should be as close to the diameter of the bearing without being bigger so it doesn’t catch the edge of the hole. That part is very important so check and double check. I also take time to realign the socket as everything starts to come together.
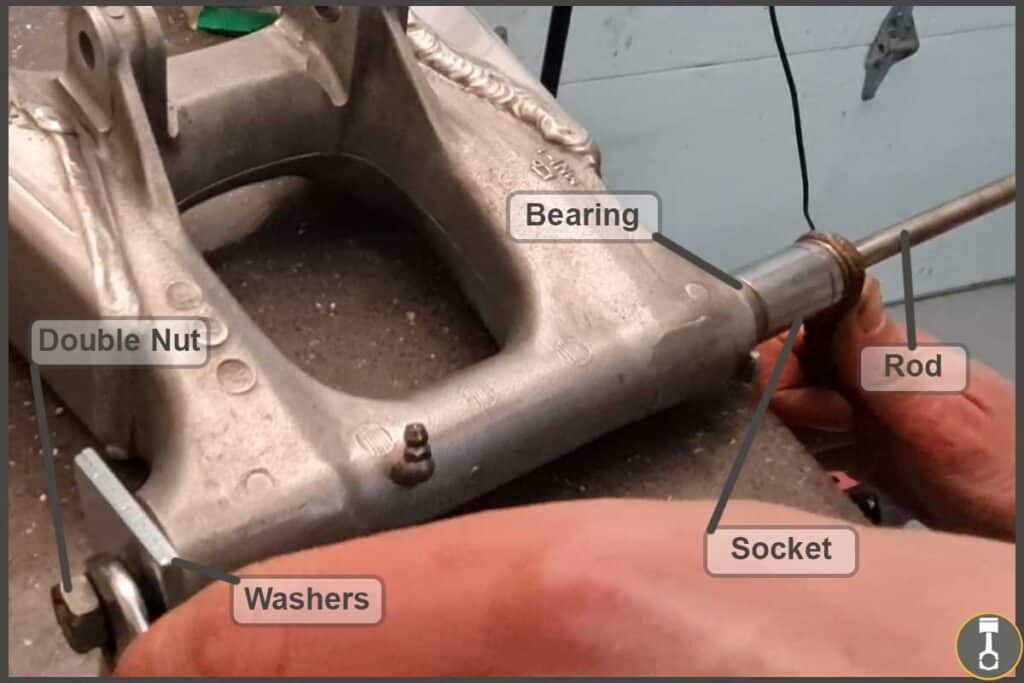
Hopefully with the pic and description you can understand what I am doing. It’s a cheap way of making sure the bearing goes in square without the cost of a bearing driver or even better, a bearing press. Then you just repeat for the needle bearing at the opposite end.
With the bearings in place, the bushing that lives inside can be inserted through one end making sure to apply plenty of the waterproof grease before doing so.
Then the swing arm bolt itself gets pushed in, again using plenty of grease. You can see on my swing arm I have a grease zerk, or nipple that allows me to use a grease gun to pump in grease which is used for adding more easily during maintenance without the needle to take things apart again.
Finally there are two caps, one for each end that live over the bolt to protect the inside from dirt.
At this stage you can mount the swing arm back on the bike if you have the linkage ready to go. For me I have the ProLink decals to add.
Applying The Swing Arm Stickers
For this XR Project, I have chosen ProLink graphics because I believe they would of been original to the bike.
I have ordered mine at www.hondaxr250.com from a chap called Chris, who himself has restored his Honda XR among other bikes, and sells a range of XR decals. This is the same site I also purchased the graphics for my plastics and they where spot on so I highly recommend him.
At the time of writing they haven’t yet arrived so I shall post a pick when they have and I have got them on the swing arm.
The product itself is a sticker rather than vinyl so it’s just a case of taking off the backing paper and applying it to the chosen area. I’ll make sure to measure out a position prior to install to makes sure I don’t out them on wonky.
Swing Arm Round Up
All in all it wasn’t hard to get this swing arm looking awesome and I would recommend giving it a go to anyone considering it. You can do it without any special tools, although that bearing puller is obviously a big help.
The bearing removal and install is the hardest part but maybe you wont need to do that. If not then you are cleaning and regreasing.
The post about the linkage is coming next so check out the Honda XR Project Page to check for new posts.
Thanks for stopping by,
Until next time….